|
AFTERMARKET STANDALONE FOG LIGHT DIY
To start, it may be a good idea to disconnect the battery at the negative terminal. Make sure that the car and ignition is OFF before doing so. You don't want to damage any electrical parts! 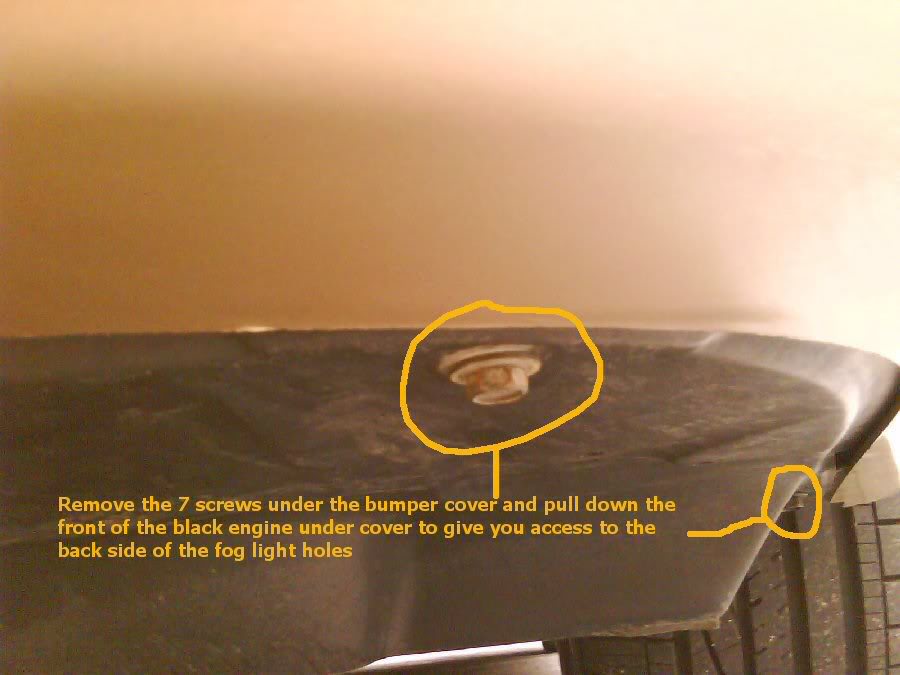 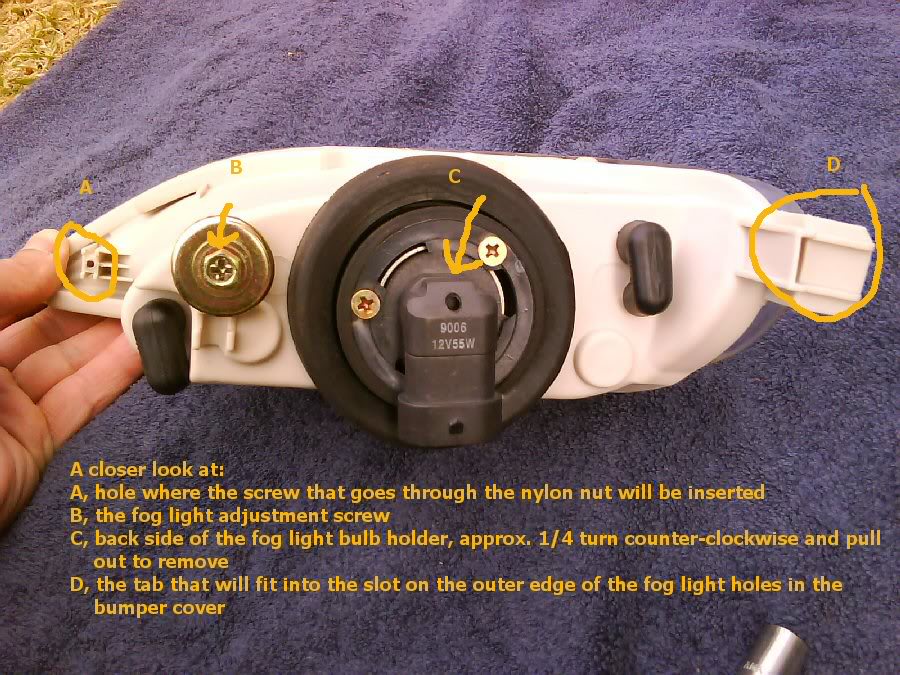 2 wiring harnesses, 1 for the lights and 1 for the switch. Fog Light Harness: 2 plugs, 1 for each of the lights keeping the one with the shorter length of wiring on the side of your battery. 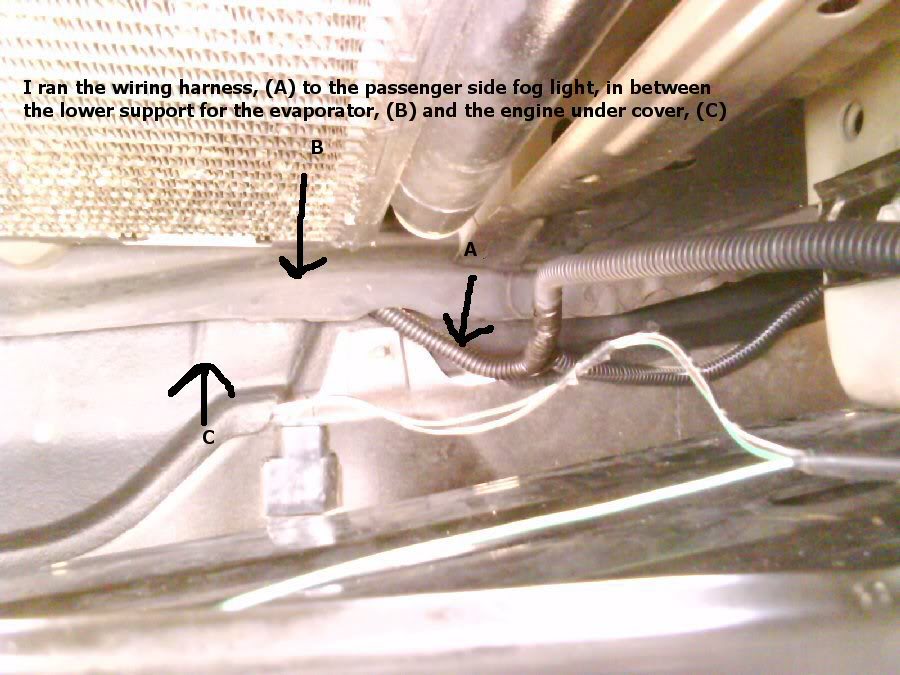 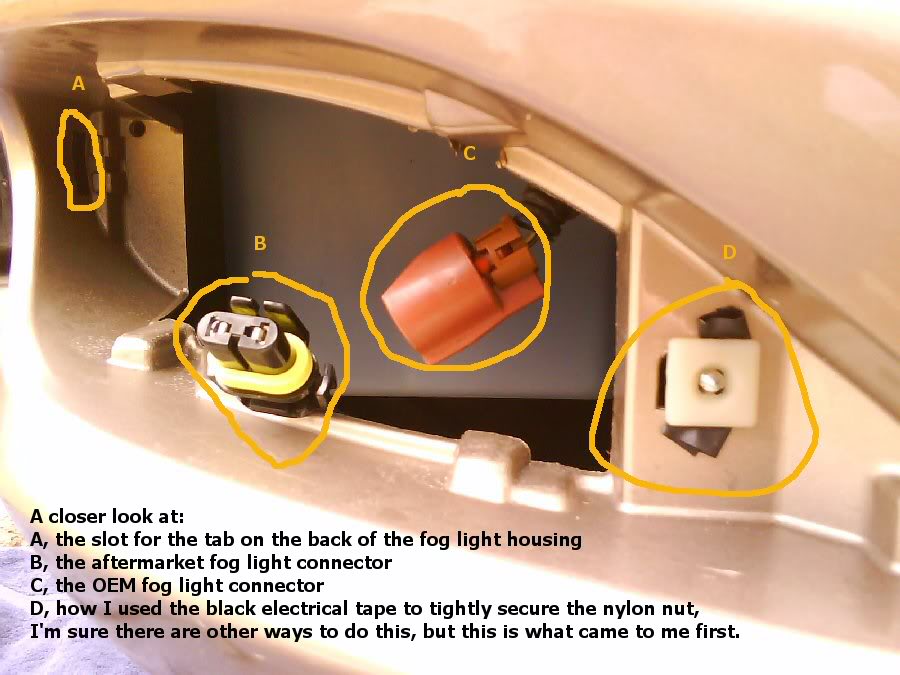 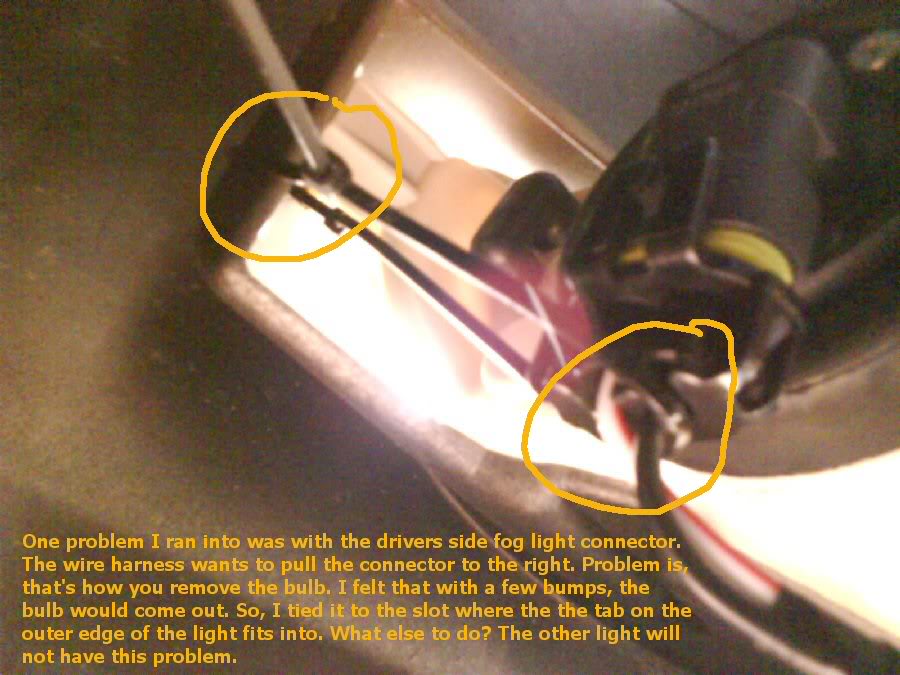 Edit 5/1/09: Regarding the 3rd picture to the right, above. I had to replace the bulb on this side two days ago and found that I no longer need to tie off the wiring. It does not pull to the right anymore. I'll assume that the wiring has loosened a bit due to the warmer weather and being out of the box, installed and stretched. *Something you might find helpful about the aftermarket fogs. I got mine from eBay. If you look at the pic of the light cutout area above, you'll see where I used a 1/4" Nylon Nut, purchased at the local auto parts store, with black electrical tape to secure it tightly. A small black plastic piece that comes with the fog lights should snap into that hole. A screw goes through the black piece, into the back of the fog light housing to secure the fog light. This black piece is very cheap and has 2 small black tabs which is what's supposed, (supposed because they didn't fit well) to snap the piece into the hole. You'll see in the following pic that these tabs are very small and broke off during my install. Even if they fit, I didn't fell confident that they would hold up for long. I couldn't get a replacement from Toyota because they come with the fog lights and are not sold separately. The Nylon Nuts fit well but, there was a tiny bit of play in the fog lights after the install. I decided to use black electrical tape as a spacer to solve this problem. I took 2 approx. 1" pieces of the tape and made a small loop out of each, with the sticky side out. I put one piece on the bottom part of the rectangular hole and the other piece on the top. Now the nylon nuts fit snug with no play at all. 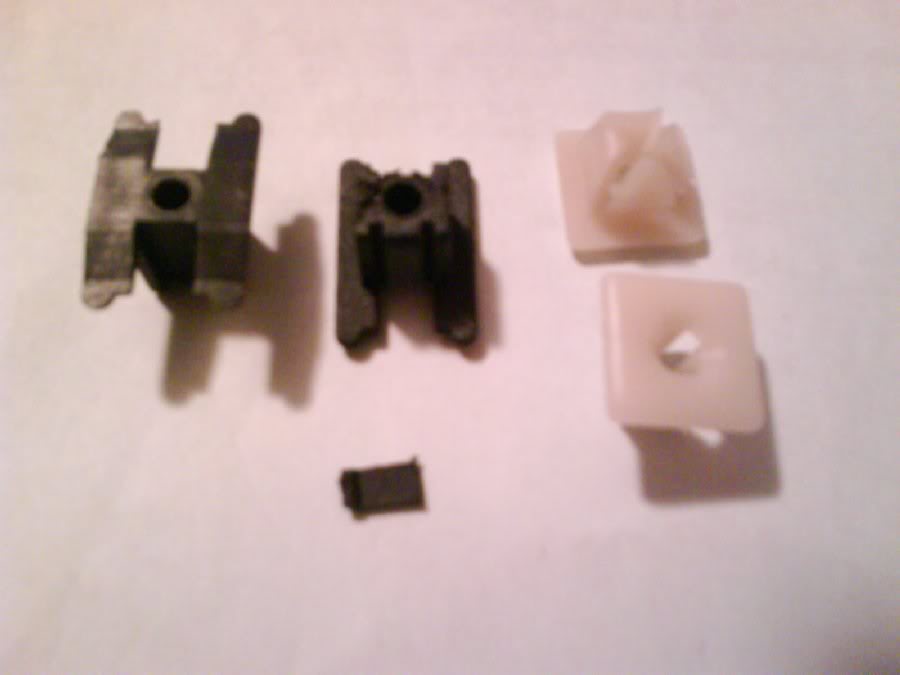 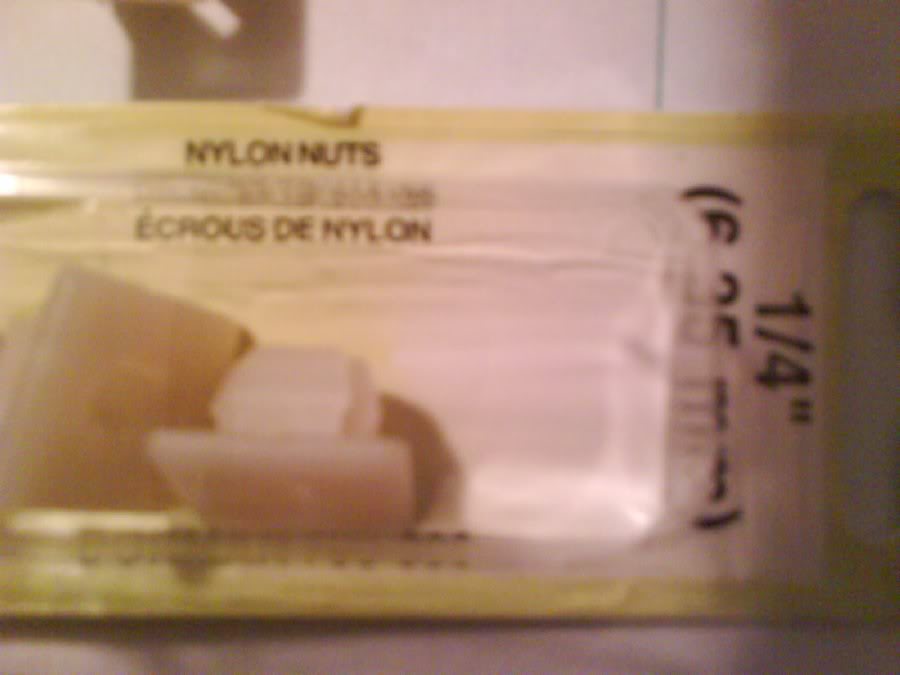 + red wire --> + battery terminal. 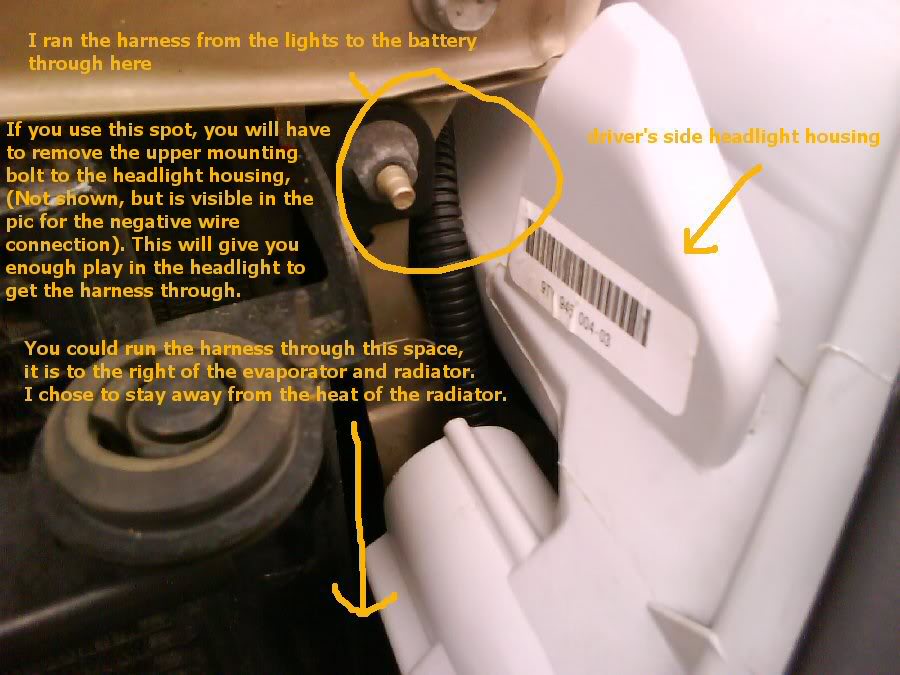 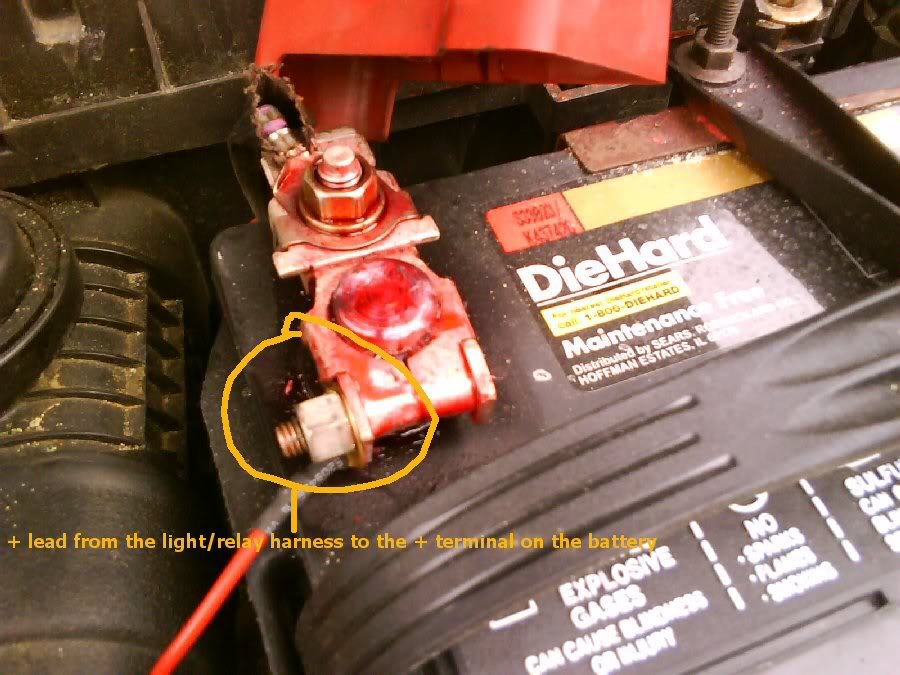 - black wire to a ground. 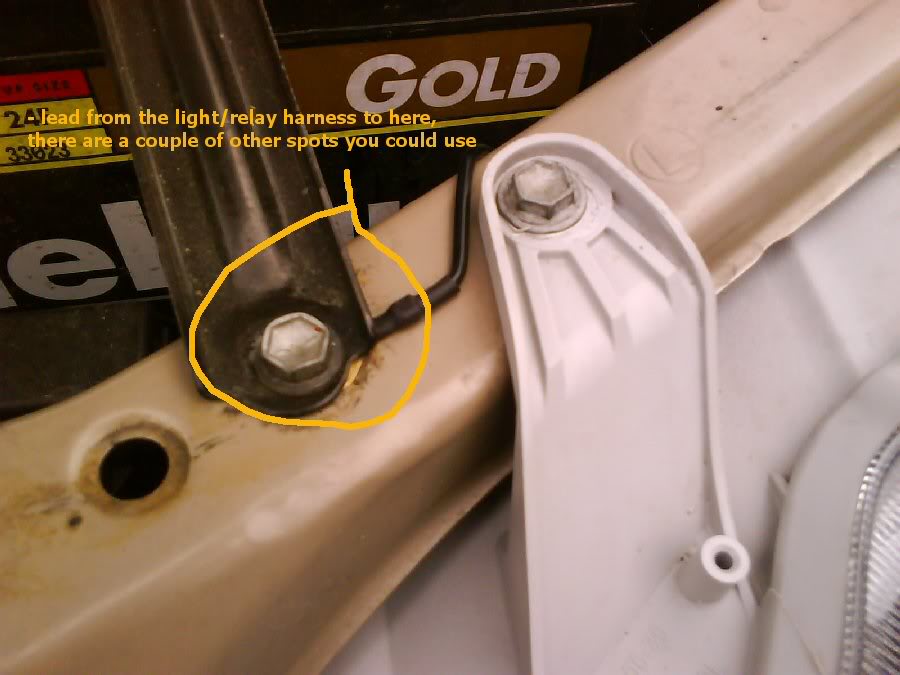 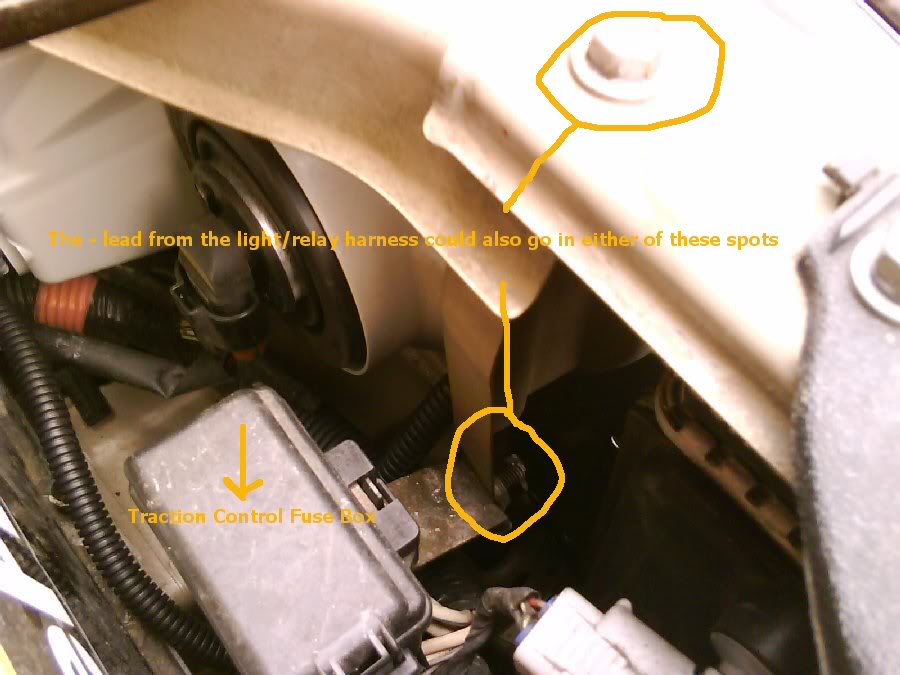 If you can find a good spot to mount the relay & fuse, congrats. Range was an issue. Here's what I did. 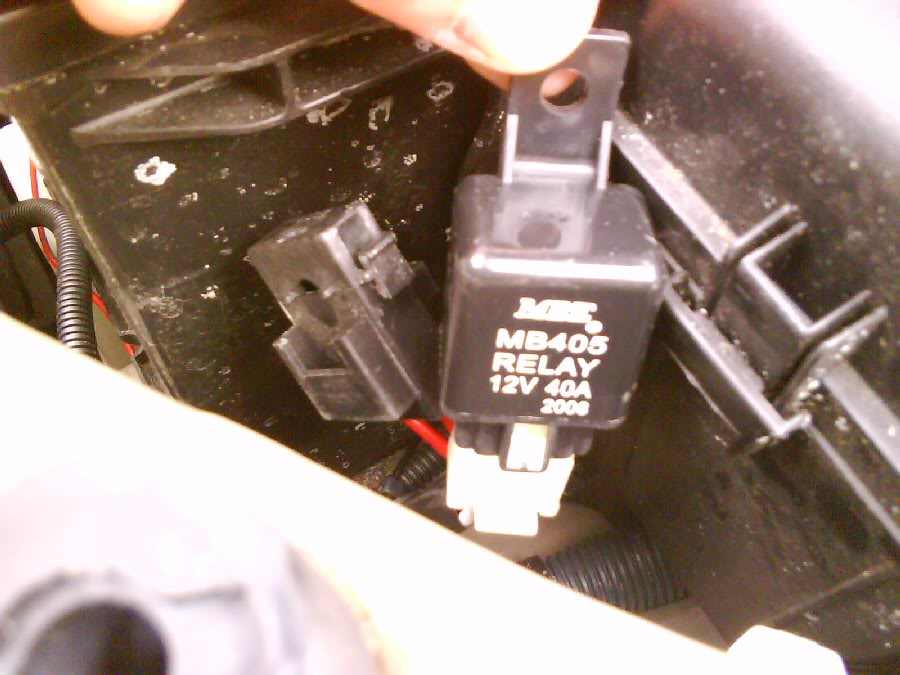 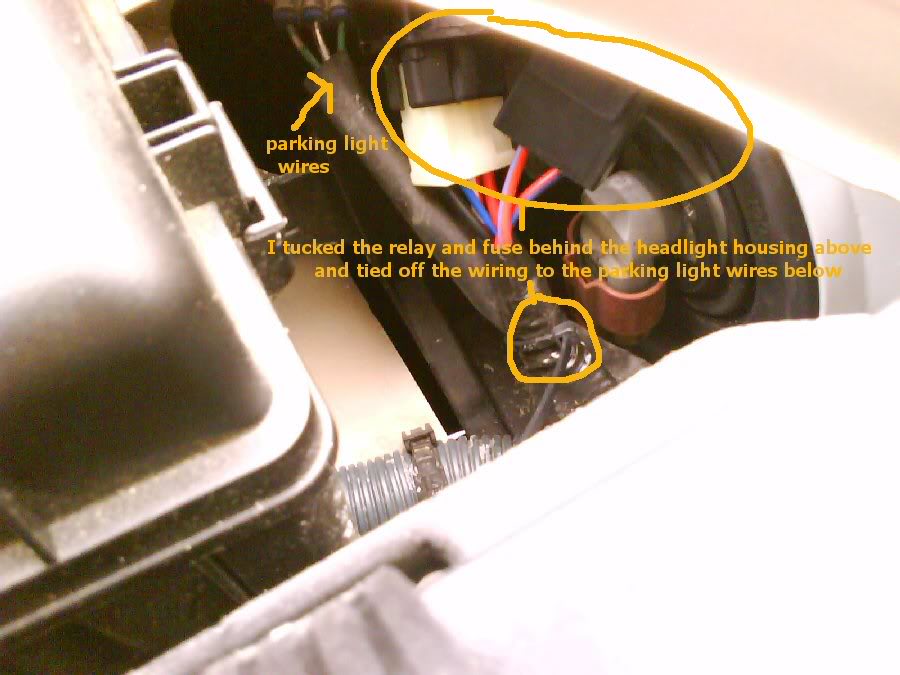 Blue lead w/male connector, from the relay to the switch. This one will have to go through the firewall. SAVE YOURSELF SOME TIME AND FRUSTRATION AND GET A SPRING LOADED CLAW TOOL FOR THIS!!! Otherwise here's how the foolish do it. I used a wire hanger and taped the lead to it real good. There's a rubber grommet, to the left of the brake fluid reservoir where a large wiring harness goes through. I popped it through there but, there's another side to it on the inside. So, you actually have to go through 2 pieces of rubber. Getting it through the second one almost made me want to buy the factory switch, and plug the lights into the existing OEM fog light connections. On the inside, it should come out above and behind the gas pedal. For my 02, the carpet doesn't reach that high, so it shouldn't be an issue. In hindsight, even without the claw tool, it would be smarter to pop the hanger through from the inside then tape the wire to it and pull it through. 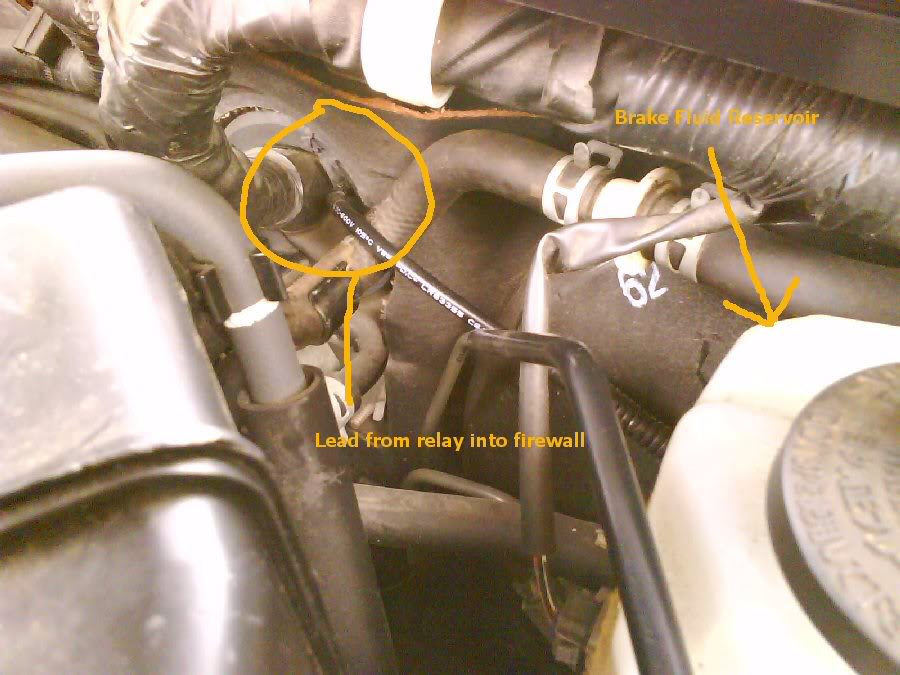 Switch Harness: Connect the plug to the switch and mount the switch. For me the switch fit perfectly into an empty slot next to the interior fuse panel door and above the traction control switch. 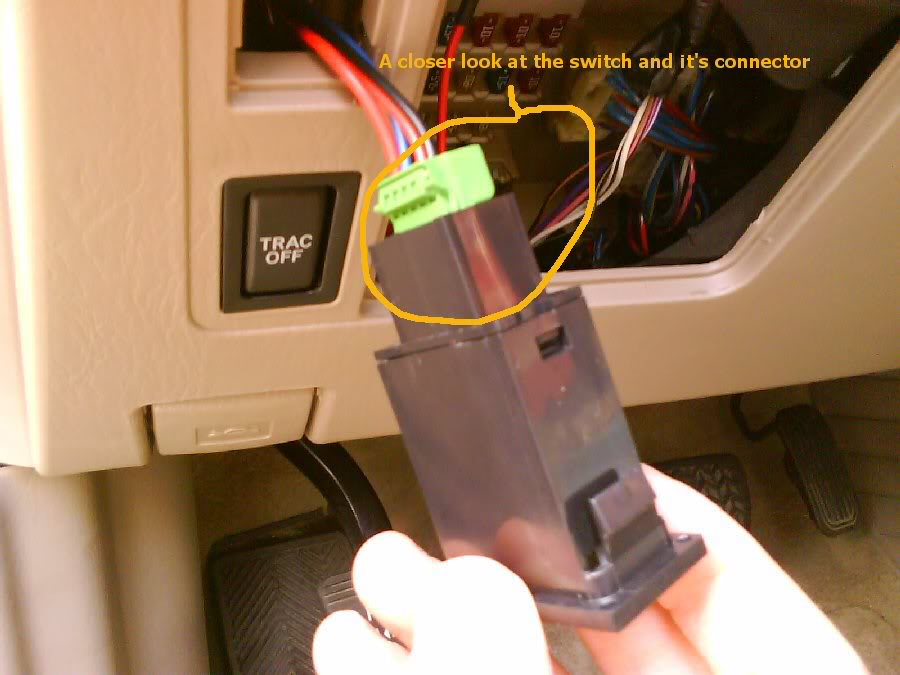 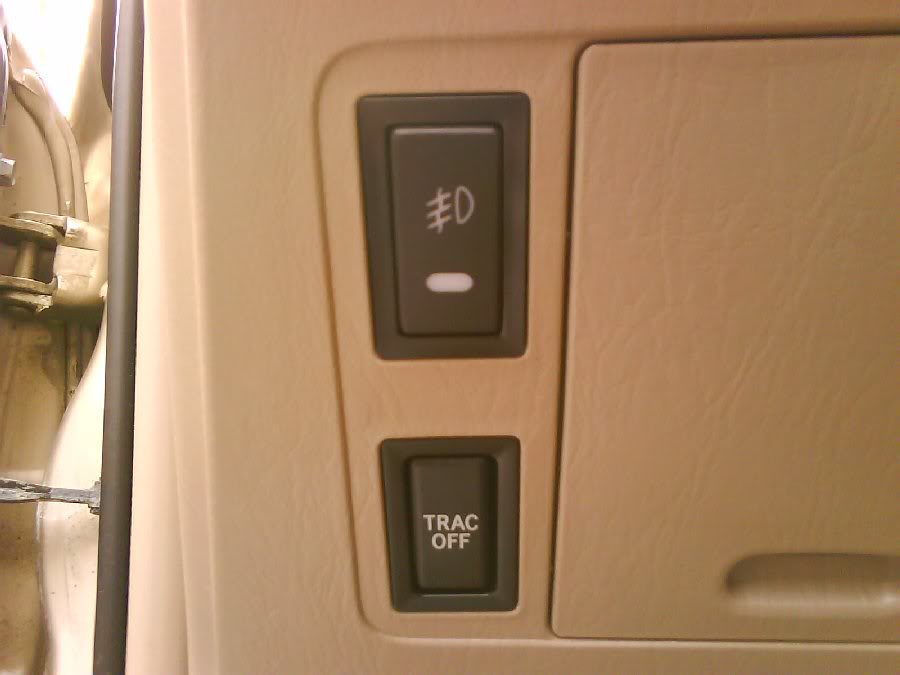 Blue wire w/female connector to the blue wire w/male connector that came through the firewall. 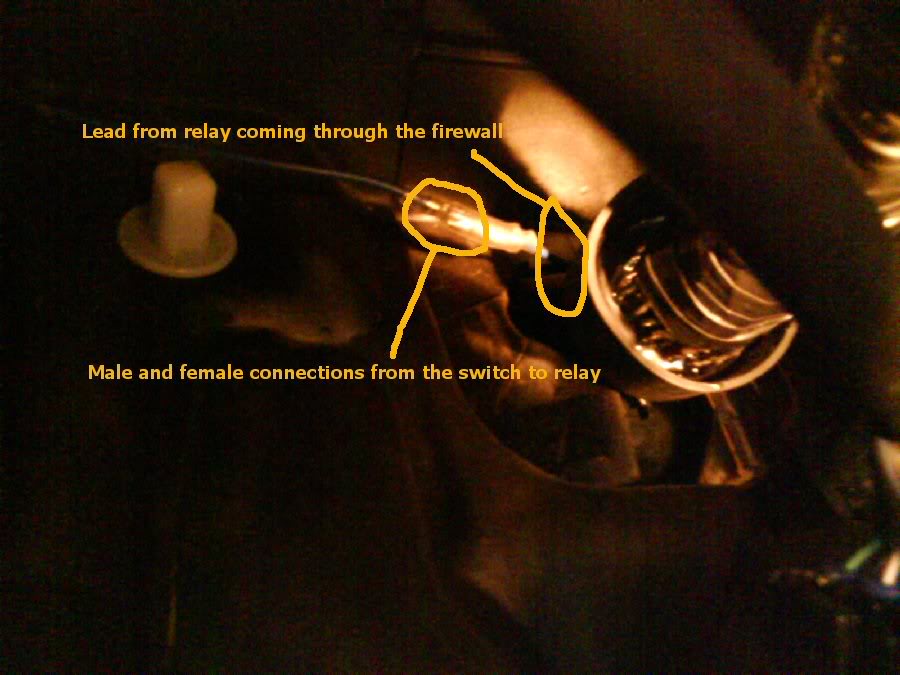 + red wire, I bought a mini add a line/add a circuit small fuse insert at the auto parts store and put it in where the 15 amp Cigarette Lighter fuse goes. I don't have a cigarette lighter so I felt safe with this one. There are 2 12V inputs in the car, 1 under the Climate Control, (I thought this one might be connected to the 15 amp cig. fuse) and one in the Center Console. Those are both controlled by the 15 amp Power Point fuse. 2 fuses go into the Add A Line, and connect the positive wire from the harness to the red lead from the Add A Line. The Add A Line package says to use up to 10 amp fuses so, I put in two of those. Seems to work fine. With this setup the switch will light up and shut off with the ignition. 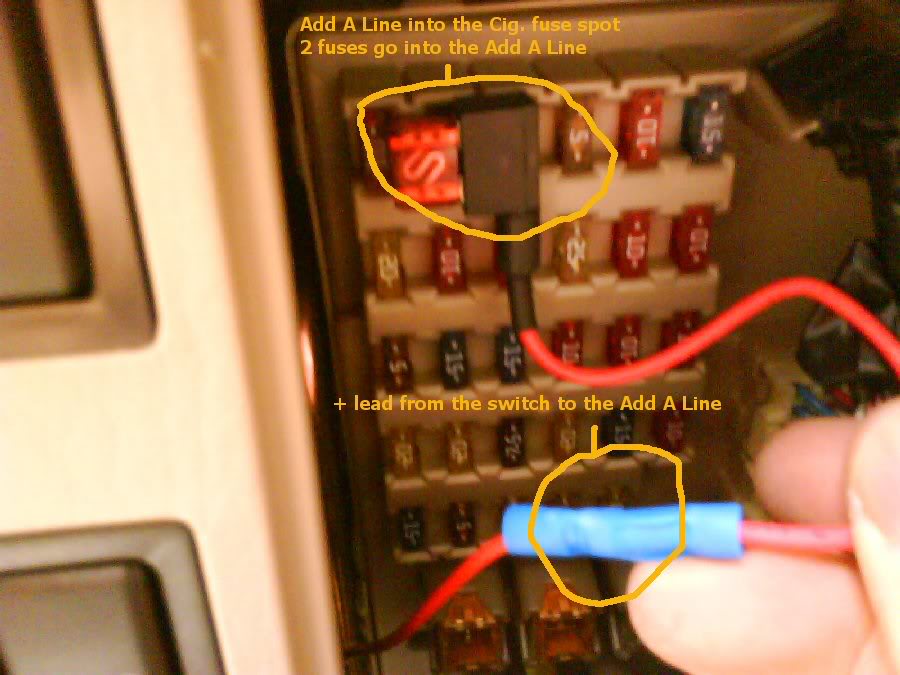  - black wire to a ground. I found a good spot behind the kick panel. To remove the kick panel, 1st remove the scuff plate, (pic 1 below). You don't have to but, it will be easier if you do. 2nd, remove the black plastic screw cap on the kick panel, (pic 3). Then pull out on the kick panel. Clean it up, put it back together, & enjoy your fogs & lighted switch! 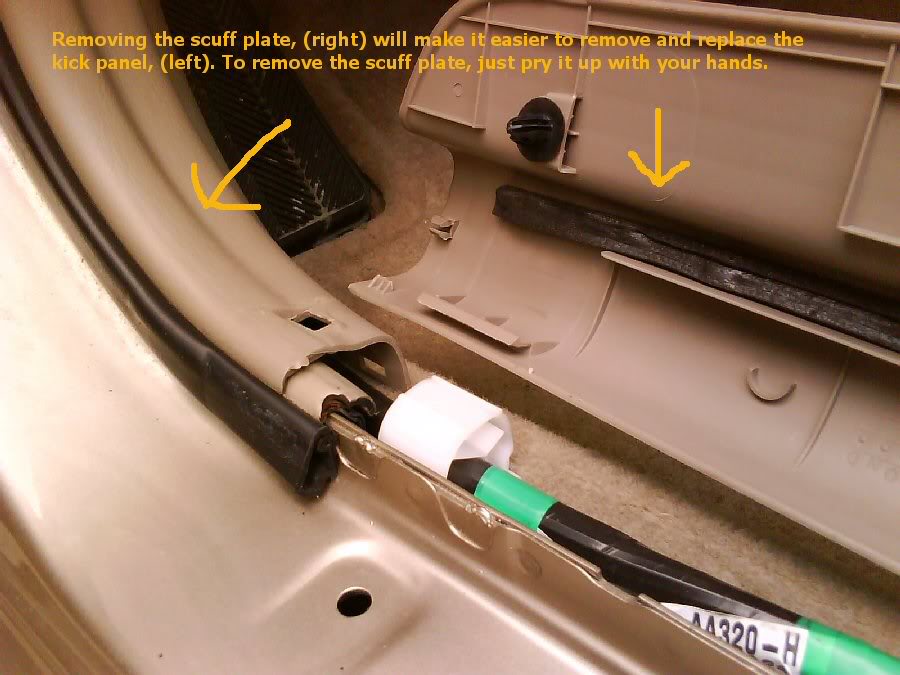 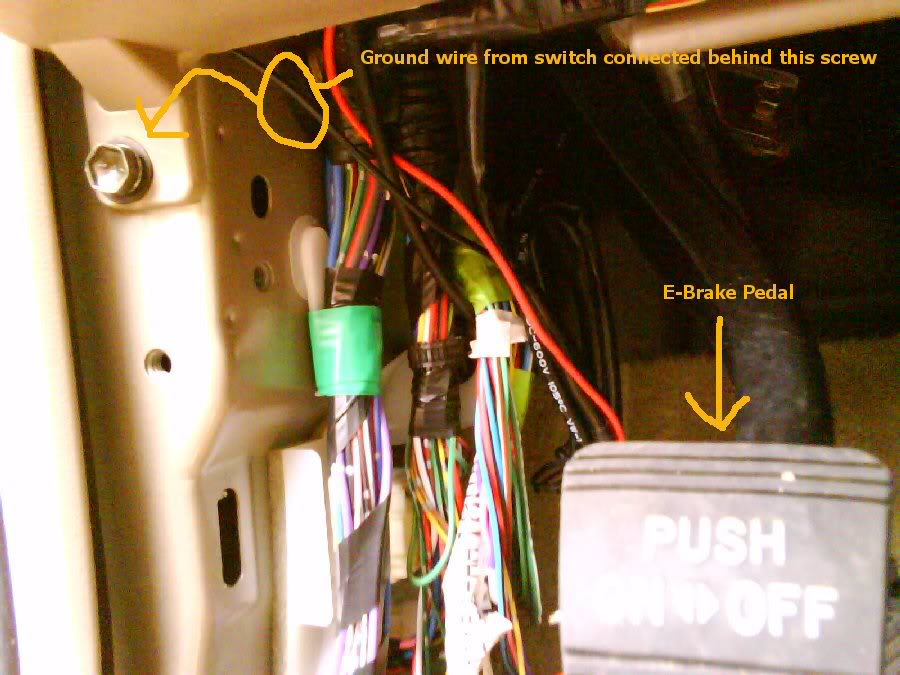 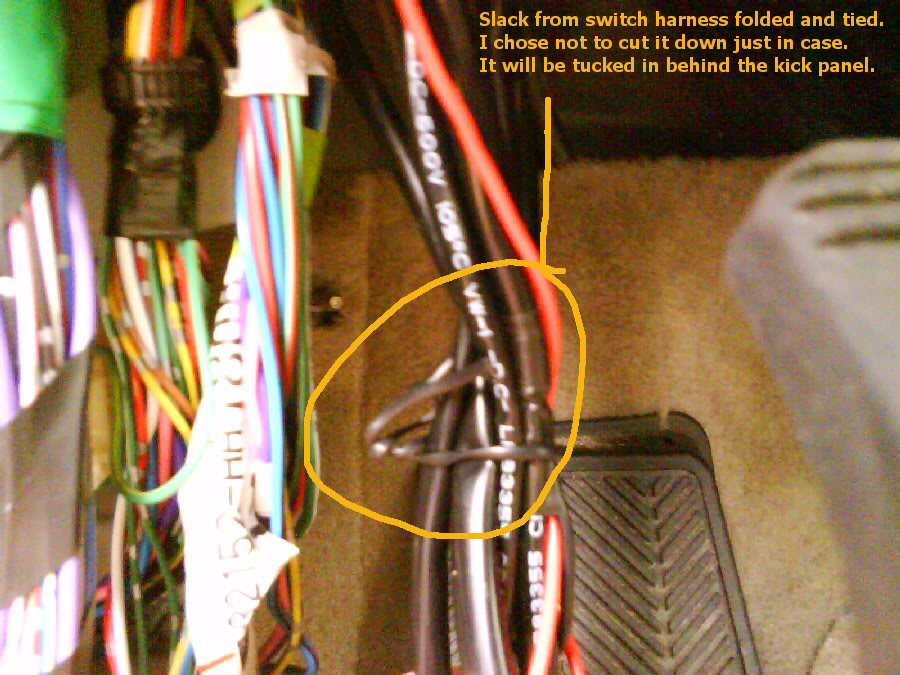 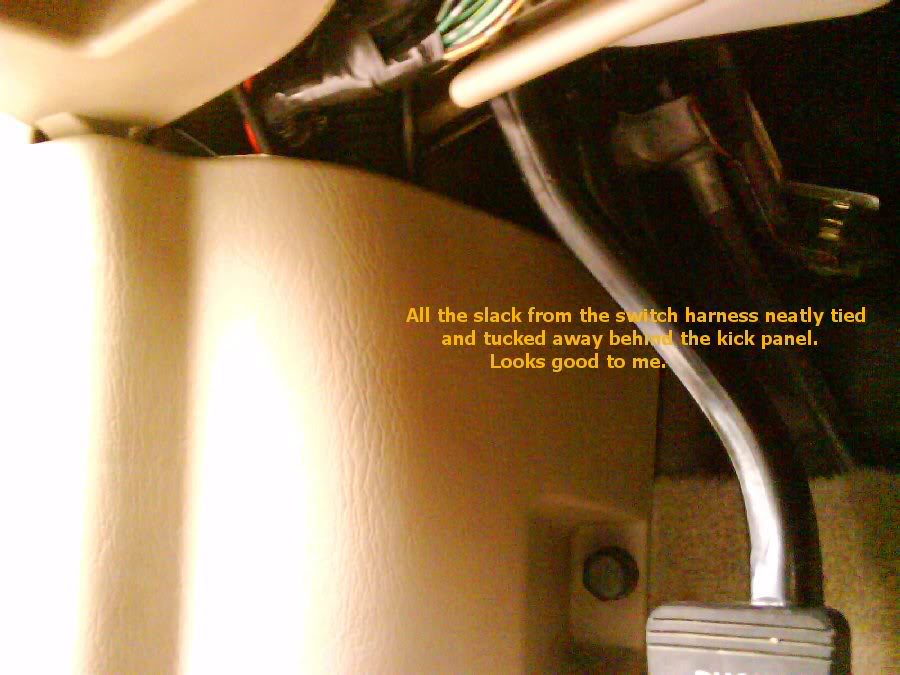 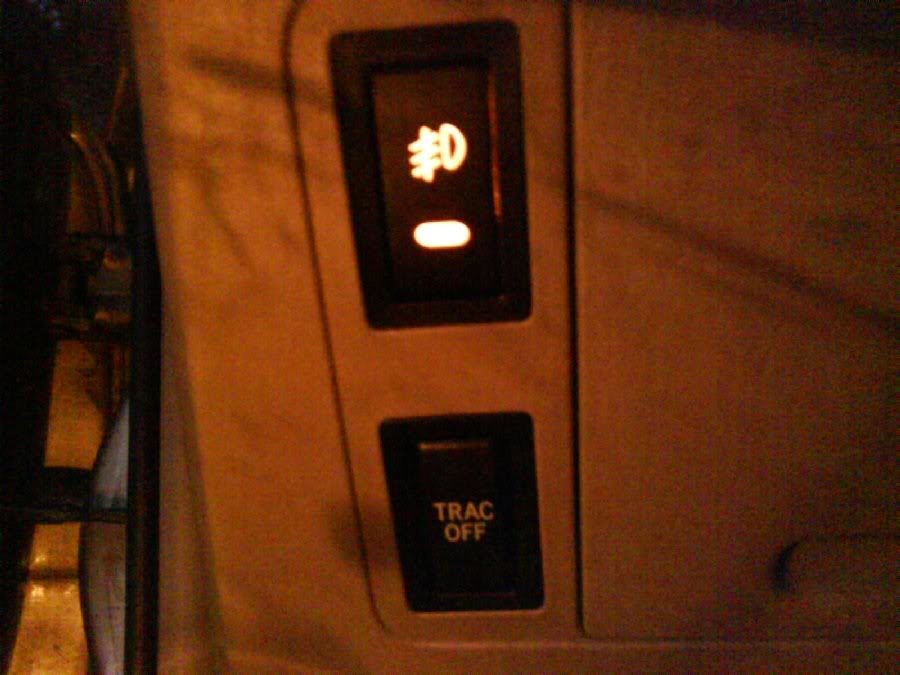 Fog Light Functionality: The car does not have to be started for the fogs to work, just turn the ign to the acc or on position. switch off = lights off switch on, ign off = lights off switch on, ign to acc or on = lights on Submitted by xxx@******.com Revision 0 Article submitted on 31 Mar 2010 Last modified on 31 Mar 2010 Viewed 8023 times |
|
|
||||