| Eventually it happens to all Z32's. The silicon bushings on the tension rods start leaking resulting in poor handling.Usually pulling to one side during braking, or nose-diving in corners.Replacing them with OEM tension rods will cure the problem temporarily,but they will fall to the same fate eventually. The ultimate solution is a set of adjustable tension rods. This gets rid of the bushing problem by replacing it with a solid bushing & allows caster adjustments due to the adjustable length. The only 'real' alignment adjustment on the front of a stock Z is the toe-in. This replacement was done on a '91 TT. Timing:
Right before getting a 4 wheel alignment, you'll more than likely have to get one afterwards. Special Tools:
Air impact wrench
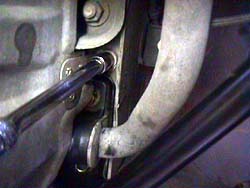
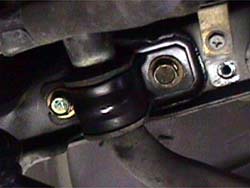
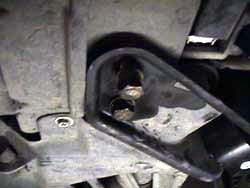
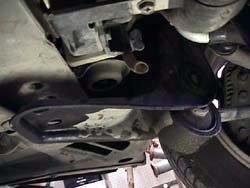
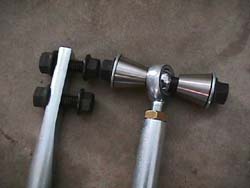
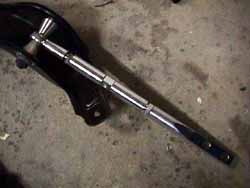
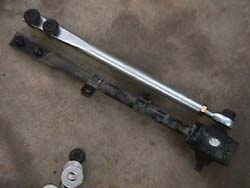
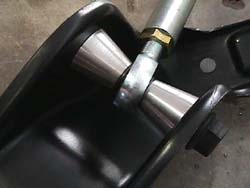
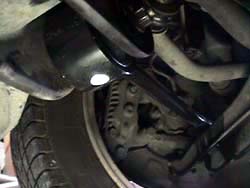
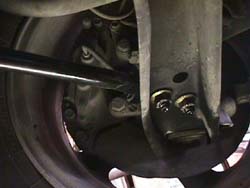
Torque wrench Install: 1. Jack up the front of the car & put it on jackstands observing all safety measures. 2. Remove the lower engine shielding (7 x 10mm), there is 1 bolt on the extreme left and right sides. (1.) 3. Read the rest of the procedure to see what bolts/nuts will be removed& spray them with a penetrating lubricant. I recommend 'Blaster' brand. 4. Remove the outer nuts on each tension rod (4 x 17mm) (2.) 5. Remove the front swaybar bushing retainer bolts (4 x 14mm) (3.).Remove the bushing brackets. 6. Remove the front tension rod bracket bolts (4 x 17mm) (4.). 7. Take out the whole assembly on each side (5.). Remove thepivot bolt (17mm bolt, 17mm nut on each) to get the tension rod out. 8. For adjustable tension rods: The adjustable tension rods allow for caster adjustments, which is not adjustable stock. These are the firstgeneration SGP tension rods (6.). These are the second generation SGPtension rods (7.). Run the bolt through the stock rod into the adjustable.Run the shafts parallel and check the length of the adjustables againstthe old stock ones to get close to the correct length (8.). Thiswill at least be good enough to get to the alignment shop for proper adjustmentwithout chewing a month off the tire life. The bolts only go through thebracket one direction, the washers go on the outside, only the cones andthe rod go inside the bracket (9.). Build up both sides. Torquepivot bolts to 80-100 ft-lbs, skip to step 10. 9. For OEM tension rods: Put new OEM tension rods in with the whitepaint dot toward the ground (10.). Torque pivot bolts to 80-100ft-lbs. 10. Reinstall the tension rod brackets. Torque front tension rod bracketbolts to 80-94 ft-lbs. & front sway bar bushing retainer bolts to 29-36ft-lbs. 11. Pull the front wheels forward to engage the studs into the lowercontrol arm . Then torque the nuts on the studs (11.) to 80-94 ft-lbsfor all but convertable, which requires 69-83 ft-lbs. torque. 12. Have the car aligned. There's a slight amount of play in the bracketholes, so things have moved around. If adjustables were installed, thingshave definitely been shifted. Also make sure to tighten the locknut(s)on the adjustables. Notes:
The air impact wrench makes this job MUCH easier. It probably can bedone with out one, but I highly recommend having one to remove the parts. REVISED 3-26-2000 |