| Another of the simple DIY jobs on the Z. Eitheras routine maintenance or as a performance upgrade, changing the sparkplugs is easy to do. When adding more horsepower performance mods, changingto a 'cooler' plug can make the car run better & avoid severe damagefrom running the car hard. Timing: The service manual recommends replacing the plugs every 60k miles. Part Numbers: 6x
| NA | TT | | Hot type | PFR5B-11 | PFR5B-11B | | Standard type | PFR6B-11 | PFR5B-11B | | Colder types | PFR7B-11 | PFR6B-11B |
|
| PFR6B-11C |
Special Tools: 16mm spark plug socket
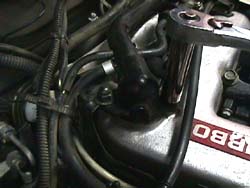
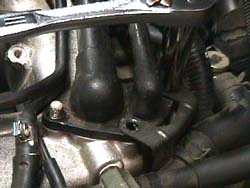
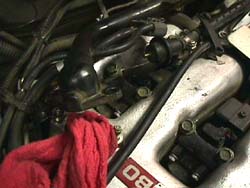
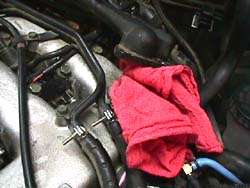
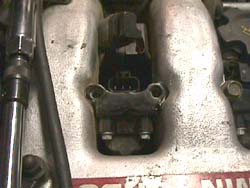
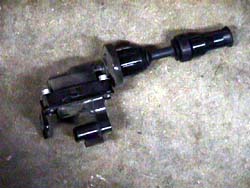
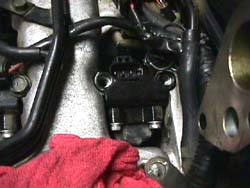
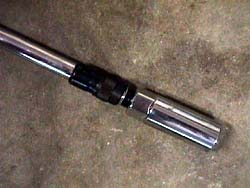
Lock release extension (8.) is helpful, but not manditory Procedures: 1. Remove the screw and bracket holding the cruise control cable tothe intake balance tube. 2. Disconnect the short vacuum line connecting the passenger side fuelpressure regulator to the intake balance tube. 3. Remove the zip tie holding the wiring harness to the driver's sideof the intake balance tube. 4. Remove the nuts & bolts holding the balance tube to the plenum(2 x 12mm bolts 3 x 12mm nuts) (1. & 2.), move the wire harnessstraps & tubing braces off the top of the balance tube flanges &'flop' the balance tube toward the windshield. Be careful not to drop anyof the three sealing O-rings into the plenum. Stuff rags into the exposedopenings to keep debris from falling in the plenum (3. & 4.). 5. Unplug all of the ignition coil wires (5.). 6. Remove the coil pack holding bolts (12 x 12mm). Remove the ignitioncoil packs (6.). The number 6 plug (rear on driver's side) willbe the hardest to work with (7.), unplug whatever wires might getin the way. On Jeff's '91 I had to unplug a few things, on Rich's '94 Ididn't, some of the wiring around the plenum is different depending onthe year. 7. Regap the plugs with a spark plug gapping tool. The boxes say pregapped,don't beleive it, check it to be certain. Do NOT use the cheap flat plugguages found at AutoDepot. Get one that has round wire measuring loops. They more accurately reflectthe gap (it's much harder to angle them wrong since they are round). Stock gap is .044",be careful to not knock off the tiny platinum dots from the electrodes. Put a littleanti seize on the threads for installation. 8. Use the spark plug socket to remove each plug & immediately replacethem with new plugs to avoid debris from entering the cylinders. I havea special socket extention that will not come apart from the socket untilI unlock it (8.). The plugs are a long way in there (9.)& the plug socket has a tendancy to stay on the plug until it's removed.Be very gentle when starting each plug not to cross thread. Torque plugsto 14-22 ft-lbs. 9. Re-install the ignition coil packs. I was unable to find correcttorquespecs for the coil pack, go with 4-8 ft-lbs (hand tight, the plenum isaluminum & will strip out easily). 10. Plug in all of the ignition coil wires. 11. Re-install the intake balance tube & get the wiring harnessbrackets back over the studs (5 x 12mm). Torque to 12-15 ft-lbs. 12. Reverse the remaining steps to complete. |