|
This is a very simple job with the right tools. This tutorial only covers removal & install. It doesn't cover changing springs etc. Tools Needed:
Parts/Supplies Needed:

1) Jack up the car, put it on jack stands, and remove the front wheels. 
2) Remove the clip for the upper ball joint and then remove the 17mm nut. Torque = 48 ft-lb (65 Nm). 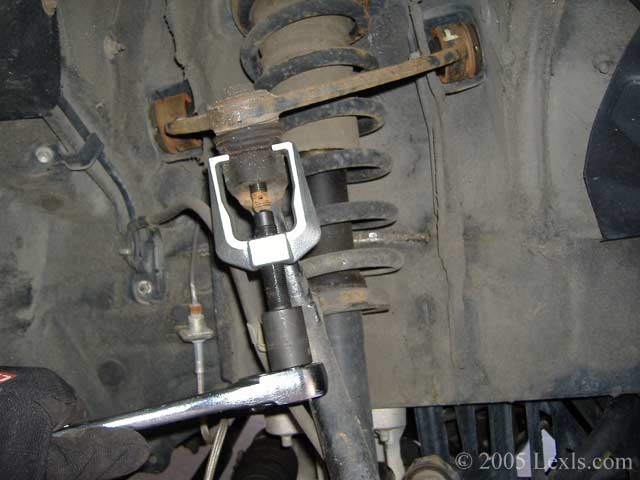
3) Using a ball joint puller, remove the steering knuckle from the upper ball joint. Just tighten the puller with a 19mm socket (for Autozone puller) and the ball joint will pop out. 
4) Tie the steering knuckle to the upper control arm with some rope or wire. Let it hang toward the back of the car as shown, you need some room to get the shock out. 
5) Using an impact wrench (or breaker bar) with a 19mm socket on the nut and a 19mm box wrench on the bolt, remove the lower shock bolt. When reinstalling, face the nut towards the front of the car. Torque = 106 ft-lb (143 Nm). 
6) Remove the 3 14mm nuts on the top of the shock. Torque = 27 ft-lb (36 Nm). Yeah, I forgot to take a pic on the other side! 
7) Turn the steering wheel in the opposite direction of the shock you're removing (right shock, turn wheel left). Then remove the shock by first pulling it back out the the lower bracket and getting the bolts out of the top. Then slide it inbetween the steering knuckle and brake line. 8) Install is reverse of removal. Submitted by xxx@******.com Revision 1 Article submitted on 11 Sep 2010 Last modified on 2 Mar 2011 Viewed 5635 times |
|
|
||||