|
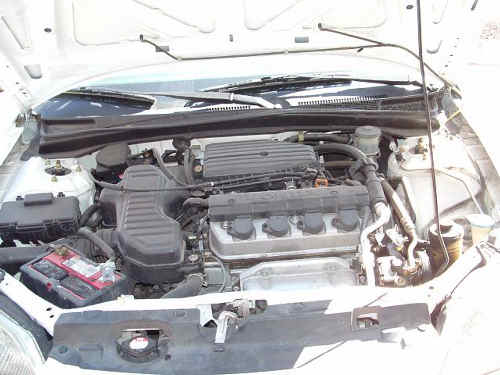
Step 1: Raise the hood and take a good look at the engine to ensure that everything appears as it should. |
|
|
Step 2: The orange handle poking up from the engine block (driver's side rear) is the oil dipstick. |
|
|
|
|
Step 3: Pull the dipstick and check the oil level and quality. In this particular case the oil is extremely dirty and there was actually too much oil in the engine (this can be just as damaging as too little). |
|
|
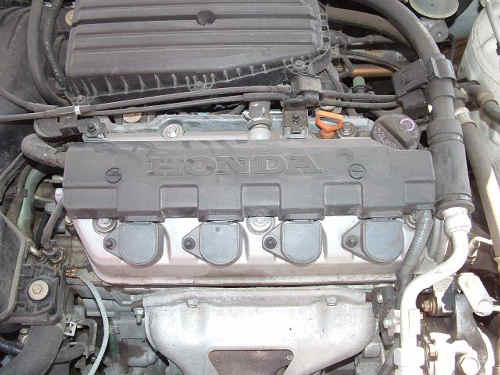
Step 4: While we're in the general area we're going to remove the oil fill cap and examine what can be seen inside the top of the block. |
|
|
Step 4A: This is not a normal oil change step. Here you see SWMBO adding engine flush to the car. The maintenance on this vehicle has been questionable. We wanted to make sure we cleaned out at much gunk as possible. Follow the directions for the engine flush. Generally it is run the car for five minutes after adding it to the block. |
|
|
Step 5: Check the undercarriage for goo, grime, od oil and damage. As you can see in this case the underside of this particular car is very dirty. That's indicative of leaks and poor maintenance. |
|
|
Step 6: Here we've located the oil drain pan and the drain plug. You'll note even more goo and grime on this side of the engine. To reach under the car at this distance you will have to jack the car up. Follow proper jacking procedures. If you don't, then don't blame me when the car falls and squishes you! |
|
|
Step 7: Reach underneath and remove the oil drain plug with the 17mm socket or spanner. Remember to finish the removal with your hand, and do not drop the plug into the drain pan. |
|
|
Step 8: Allow the engine oil to drain out into the drain pan. |
|
|
|
|
Step 9: Now that you've got the oil drain plug out it's time to examine it. If you look closely at the image you can see damage on this oil drain plug. The head is rounded off and the threads look a little beat. When removing the bolt from the oil pan there was much more resistance than there should be. This is indicative of damage to the threads of either the drain plug or the oil pan. |
|
|
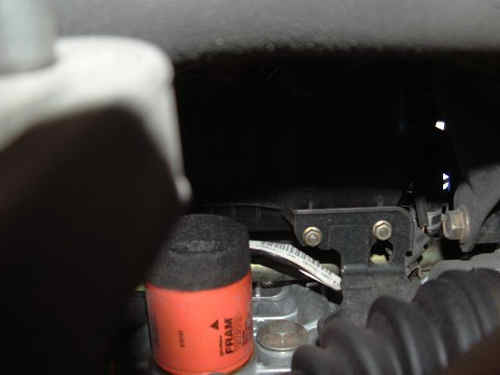
Step 10: Now it's time to remove the oil filter. At this point I am convinced that the Honda engineers never asked a mechanic about their design. What an idiotic place to put an oil filter. The oil filter is located on the firewall side of the engine halfway down the block. Note that it is horizontal to the block, this won't be fun. |
|
|
Step 11: Here you see why horizontal oil filters are not fun. Based on the placement, lenght of the sin on shaft and overall placement there's no clean way to remove the oil filter. All the dampness on my back is from the oil filter dumping all over me. |
|
|
Step 12: Here we are preparing the new oil filter. Wipe some fresh oil on the rubber fing and threads to ensure it seals correctly. |
|
|
|
|
Step 13: Before we replace the oil filter we need to wipe off all the surfaces to ensure everything is clean and ready for the new oil filter. When clean, spin it on, and tighten it so that it's hand tight plus 1/2 turn. |
|
|
Step 14: Everything wet in this filter is due to the oil filter removal, what a mess. Note the blue around the oil drain plug? This was put on by the previous person to change the oil. They screwed it up and the blue gunk was their attempt to seal the problem. This is why you never take your car to Wal-Mart! |
|
|
Step 15: Here we're pouring off the old oil for recycling. You know oil is bad when it passes the coffee test. If the oil is blacker than the black coffee I drink (which is super strong) then it's really bad. |
|
|
Step 16: And this is why it's good to pour off the oil and watch it. If you see the sparkly bits on the bottom of the pan, then you're looking at some part of the interior of the motor. We're seeing metal flecks, which means we'll have to watch this motor closely. |
|
|
Step 17: So, once we've ensured that the oil drain plug and oil filter are reinstalled we can refill the engine. Here we're pouring in the new motor oil. |
|
|
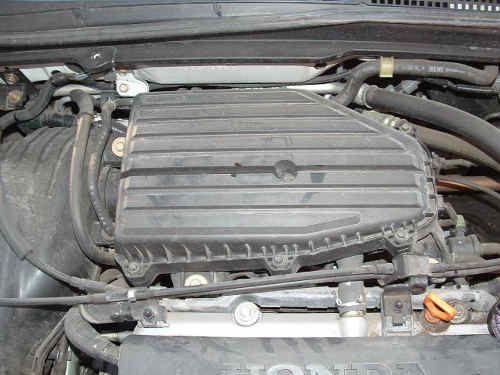
Step 18: You should always check your air filter and/or replace it. Here you see the air filter assembly. |
|
|
Step 19: Undo the fasteners that hold down the air filter box. This can be done with either a #2 Phillips head or a 10mm socket. I recommend the socket as it's harder to round the fasteners that way. Two of the fasteners on this assembly were stripped in the screw head segment from improper removal in the past. |
|
|
|
|
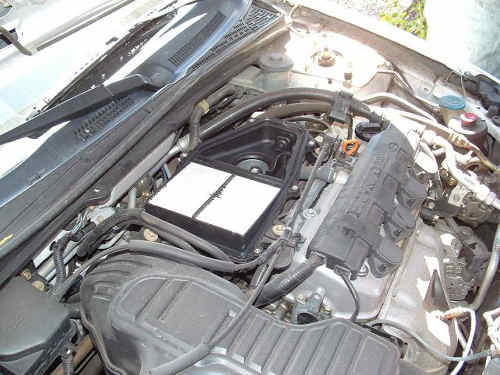
Step 20: Here you can see the air filter as it is installed in the vehicle. It's a bit of an odd air filter. |
|
Step 20: Air filters always look clean until you compare them agains a new one. Here you can see the new air filter on the left and the old one on the right.
Air filter reassembly is simply the reverse of disassembly. We noted that the gasket on the air filter wasn't installed correctly at the factory and we had to reseat it appropriately. |
|
Step 20: Normally I don't have to do this (despite the overall look of my driveway). Because of how messy the oil change was due to the filter placement we also had to clean off the driveway. I recommend you put down a big piece of carboard when you do your oil change.
While you're at it, put some fuel injector cleaner in the gas tank and fill it up with gas. |
|