|
Last week my dad and I replaced the heater core in my 98. However, prior to starting, I had a hard time finding any thorough documentation on performing this not-so-enjoyable job. So after taking the heater core out using a combination of a Haynes manual, pages from AllData, I thought I would take some pictures while putting it back in to try and make a How-To. Please feel free to make any corrections or suggestions on how to do this replacement more efficiently or safely so the job is as easy as possible for anyone else planning to do it. This was my first time replacing the heater core and I’m writing this mostly out of memory, so I’m sure there will be at least a few mistakes that will need revising. I strongly advise that you use as many different sources as possible, including, at the very least, a Haynes/Chiltons manual. Disclaimer: I am in no way responsible for any damage, whether physical or mental, that you might incur on your vehicle, yourself, or others while attempting to replace your heater core. Socket Sizes Needed: M13, M10, M8, T27 Second Set of Hands Recommended Overview: A. Disconnect negative battery cable. B. Remove plastic dash trim pieces C. Disconnect wiring connectors D. Disconnect AC/Heater control cables and vacuum lines E. Remove dash bolts F. Drop down dash G. Drain coolant H. Remove HVAC box I. Remove heater core J. Reverse to install A) Disconnect battery ground cable. Option (courtesy of bobbyrandall): To create more room for yourself, consider removing the front seats. Doing so will make many steps of this process easier, including removing the dash to body bolts around the steering column, dropping and reinstalling the dash, and removing and reinstalling the HVAC box. It will also prevent the possibility of damaging the seats. If I were to do this job again, I would take the time and effort to remove them. However, doing so isn't necessary, and doesn't allow you to sit in the seats while removing some of the plastic dash covers and dash bolts. B) Remove plastic dash trim pieces For a few helpful pictures of removing some of the dash pieces, as well as a couple very clear pictures of the dash-to-body bolts around the steering column, take a look at the beginning of w103rtm's Trans Swap How-To: http://w103rtm.freevar.com 1. Remove the top dash cover. There are just two clips from the center to the passenger side that can easily be popped out from that side. Then there are four around the gauge cluster. Pop these out by pushing up with both hands on the bezel where it overhangs the gauges. There’s also one clip on the far driver’s side. 2. Remove the passenger side dash piece that surrounds the airbag. It goes from the right side all the way to the steering wheel and is held in by six screws. Before pulling this out disconnect the fog lights and rear defroster switches (if applicable). 3. Remove the driver’s side dash piece by removing the three screws. 4. Remove the plastic steering column cover. It’s attached with three screws along the bottom and a clip on either side of the steering column at the top. 5. Remove the metal steering column cover by taking out the two screws at the top. 6. Remove the glovebox. It’s held in with three screws along the bottom and then can be pulled out. 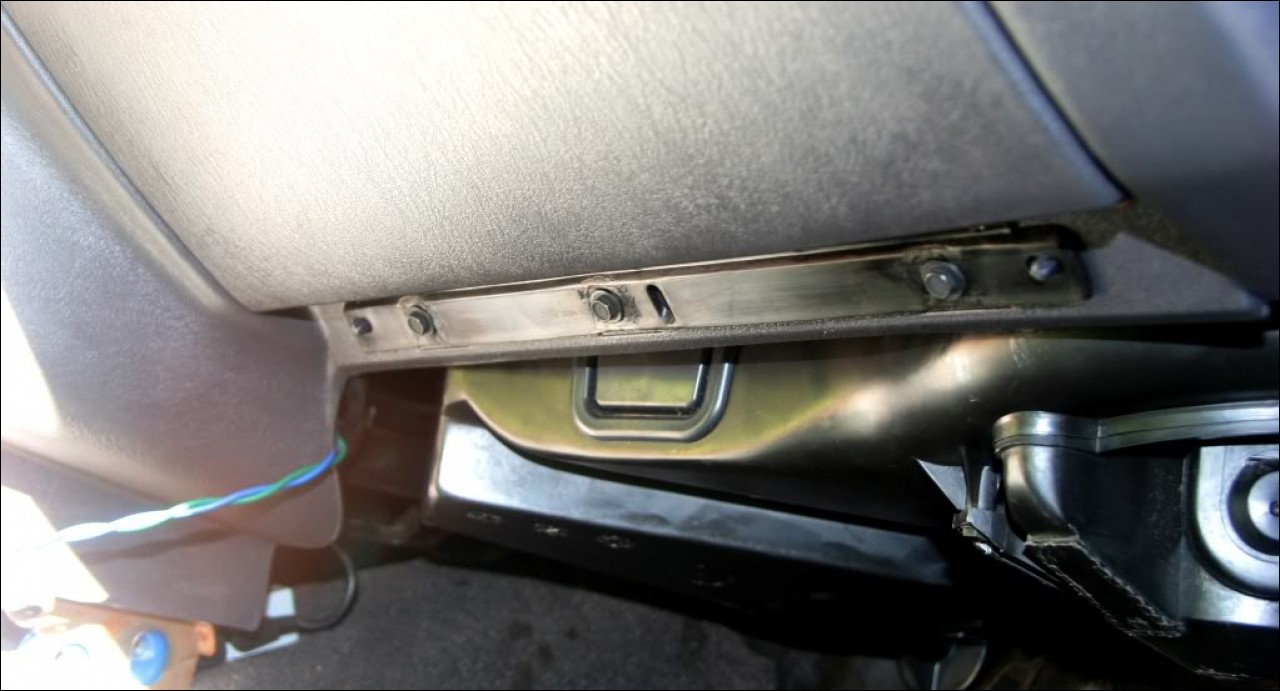 7. Remove the center console. There are two screws under small plastic caps by the cup holders and four screws in the bottom of the console. 8. Remove the driver’s and passenger’s side kick panel covers. These are each held in by two clips. 9. Remove the center air duct piece. Snap each side clip out and pull. C) Disconnect wiring connectors 1. Disconnect the large blue, tan, and black connectors behind the gauge cluster close to the windshield.   2. Disconnect the blue connector behind the passenger side airbag. 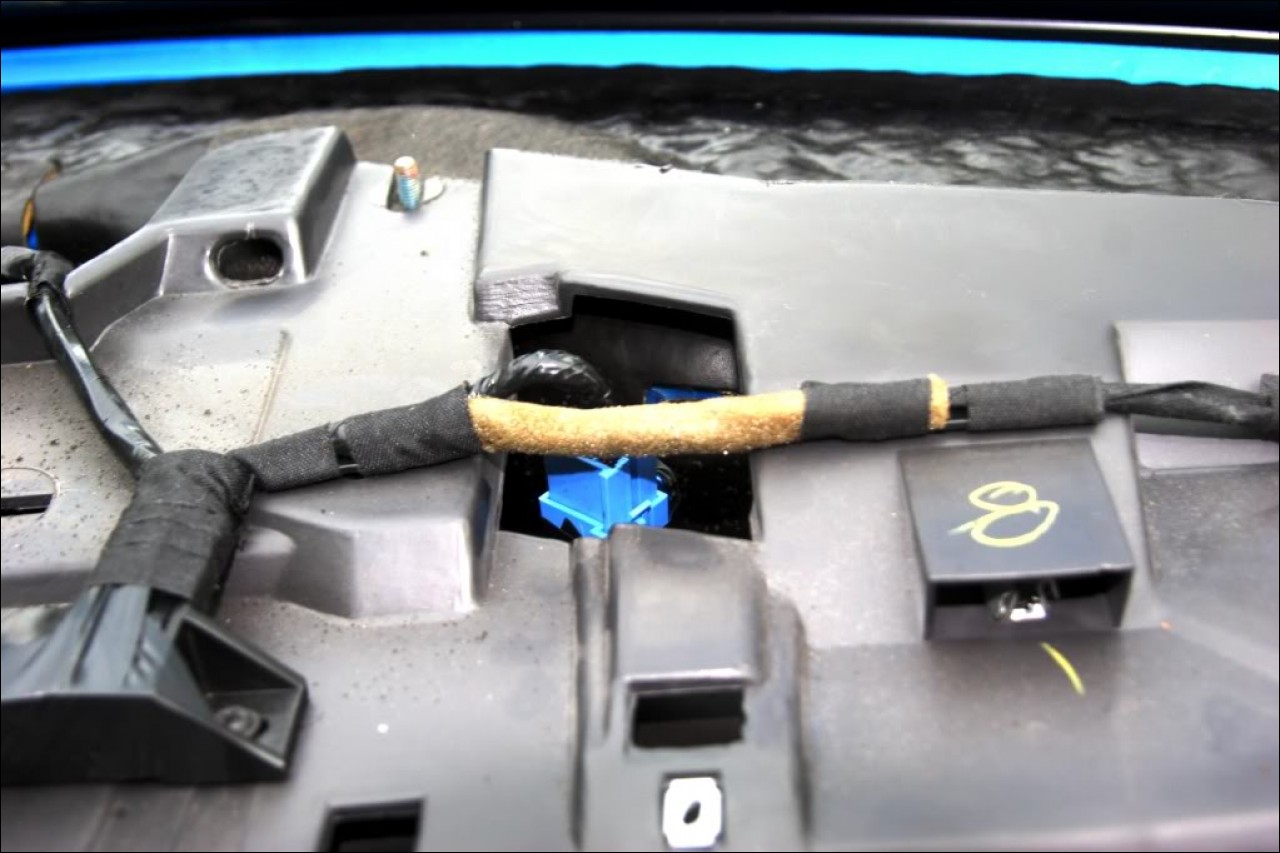 3. Disconnect the antenna connector that’s located under the dash on the passenger’s side.  One bundle of wires goes from the dash through the firewall to the windshield wiper motor and the blower motor resistor. To access these, the cowl needs to be removed, which means removing the windshield wipers. Time Saving Option (Courtesy of Uptown Sport): Skip steps C-4 and C-5 (removing the wipers). After removing the screws in step C-6, you can squeeze your hands under the cowl and disconnect the two connectors. This will save you the time and hassle of removing the wiper arms, however, it might make it more difficult to release the connectors. 4. Remove the plastic covers on the wipers. A screwdriver might chew up these caps. I used a knife to carefully remove them. 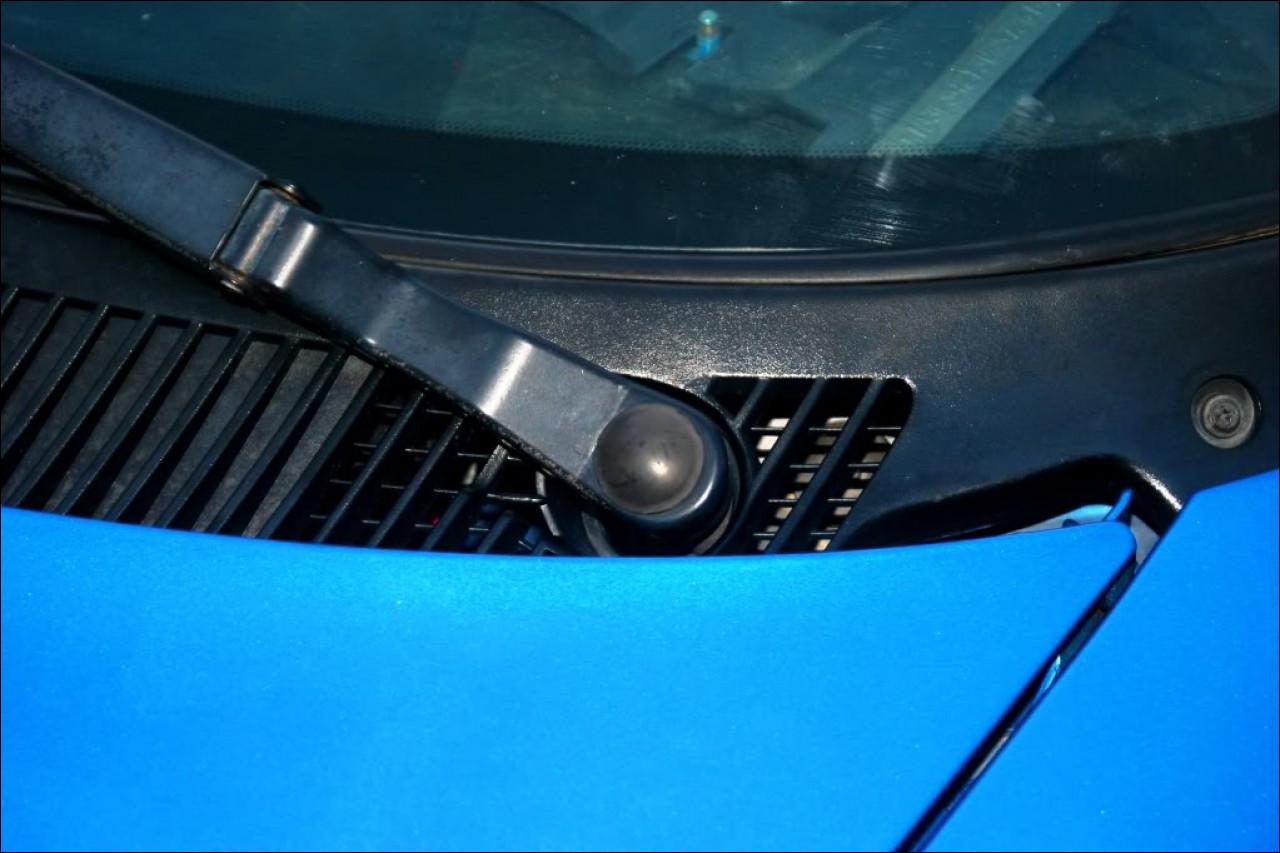 5. Remove the wiper nuts (13mm). Make a mark between the stud and wiper arm to ensure proper alignment on reinstallation. Remove wipers (may require some “wiggling and jiggling”, to be technical). 6. Remove the 5 screws holding the cowl in place and pull it off to expose the connectors. Disconnect the connectors and the plastic grating, then pull the wires through the firewall. 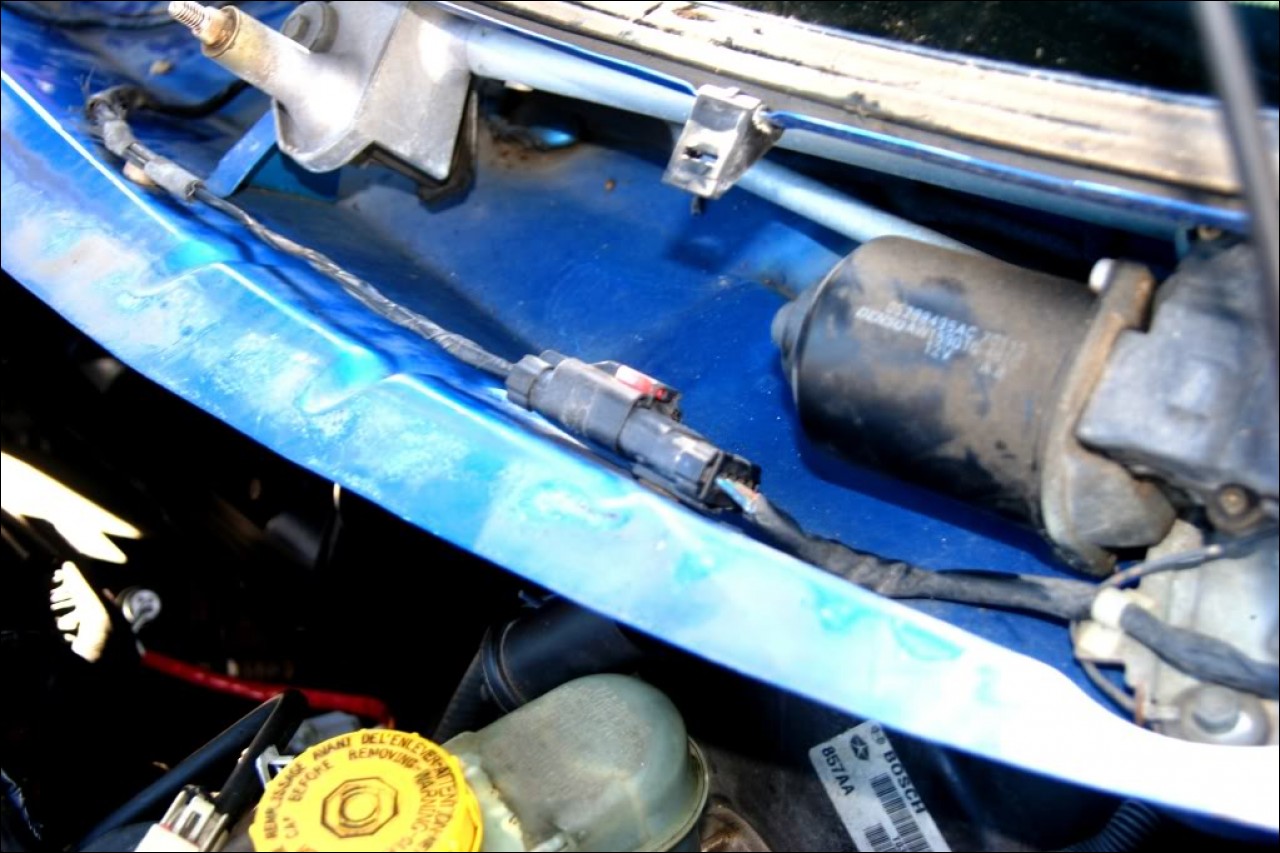  D) Disconnect AC/Heater control cables and vacuum lines 1. Remove the black and red vacuum lines from AC/Heater controls. (Removing these hoses and the cables may be easier after removing the AC/Heater control bezel, but it’s possible leaving it intact).  2. Be careful here or you might break an AC/Heater control lever like I did. First, you need to remove the metal clips holding the cables in position. Be careful not to drop them. To remove the air location knob cable, turn the knob all the way clockwise to give yourself as much slack as possible in the cable. It attaches similar to the throttle cable. The cable needs to rotate counter clockwise until it is aligned with the slot and can be pulled upwards and be disconnected. Then again, maybe you shouldn’t be taking my advice, because clearly it didn’t work out too well for me. I pulled up when the cable wasn’t lined up, and I ended up breaking off the top half of the lever. If you do break it, make a fix for it and test it before putting everything back together (obviously). 3. Remove the metal clip holding the black box with the vacuum lines attached to it. Turn the temperature control knob all the way clockwise to give as much slack as possible in the cable. Pull cable counter clockwise while pulling down to remove. This one wasn’t easy; again, be careful.  E) Remove dash bolts 1. Remove the pinch bolt connecting the steering column to the steering shaft. First, turn the steering wheel counter clockwise until it locks. This position provides good placement of the nut to get a socket on it, and locking it prevents the steering wheel from freely spinning after the bolt is removed. If the wheel was to be turned an excessive amount of turns while freely spinning, the clock spring would break and you would lose power to the airbag, the horn, and cruise control. To be safe, you can also tie or tape the steering wheel in position to manually prevent it from spinning.  The (out of focus) picture shows the steering wheel straight, where removal of the nut would be difficult due to interference with the brake pedal arm. Reinstallation note: The torque for this bolt/nut is only 250 inch pounds. 2. Remove the four bolts around the steering column connecting the dash to the body (13mm). Leave the four nuts, these just connect the column to the dash. In this (terribly out of focus) picture, you can see the two bolts on the passenger’s side of the steering column. The other two are in similar positions on the driver’s side of the steering column.  3. Remove the 4 nuts across the top of the dash (10mm). 4. Remove the 4 bolts attaching the center of the dash to floor (two on each side, 13mm).   5. Before removing more bolts, place something under the dash in the center t to keep it supported. I just used a couple of beach towels. (The ash tray wasn’t in when I did this; I assume it would be fine if was left in, but I’m not sure whether keeping it in might damage it due to the weight of the dash. You may want to take it out anyways to create a slot that will keep the dash steady when lowered down.) Here’s what the dash will look like after removing the bolts in steps E-6, E-7, and F-1.  6. Remove the driver’s side lower bolt near the hood release that was under the trim (13mm).  7. Remove the passenger’s side lower bolt (13mm).  F) Drop down dash 1. Remove the upper driver’s and passenger’s side upper dash bolts (13mm). There's two on the driver's side and just one on the passenger's side. Slowly lower the dash down onto the towels (this is easier with two people).    2. Cut the zip tie holding this wire bundle (which is behind the glovebox) in place so that you can pull the dash out further to provide as much room as possible for removing/installing the HVAC box (HVAC box has already been removed in these pictures). 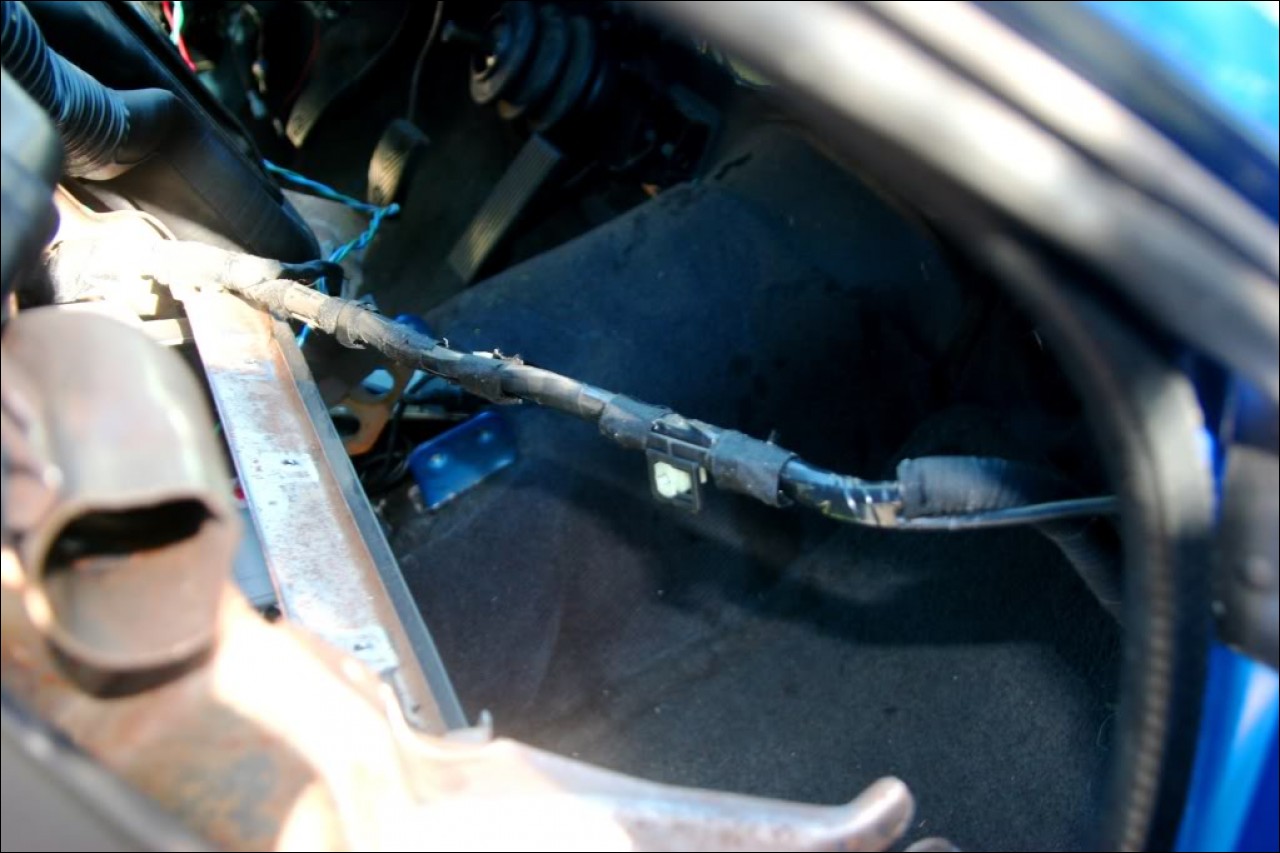 3. If you want more room to remove the HVAC assembly, follow these wires as they go under the dash. The connector for it should be near where the radio antennae cable goes through the body. Disconnecting this will allow you to pull the dash out further and prop it up over the passenger's seat. (Thank you MichNeon). G) Drain coolant from the radiator petcock. H) Remove HVAC box 1. Disconnect the heater hoses from the heater core. 2. Remove the coolant overflow bottle (if using stock bottle). 3. Remove the air filter box (if running stock intake). 4. Remove the rubber condensation drain tube.  5. If you have AC and it’s still hooked up, discharge the system. Then remove the AC lines going into it (refrigerant line-sealing plate assembly). Then remove the expansion valve by removing the two T27 torx screws.  6. Remove the vacuum line going to the brake booster. 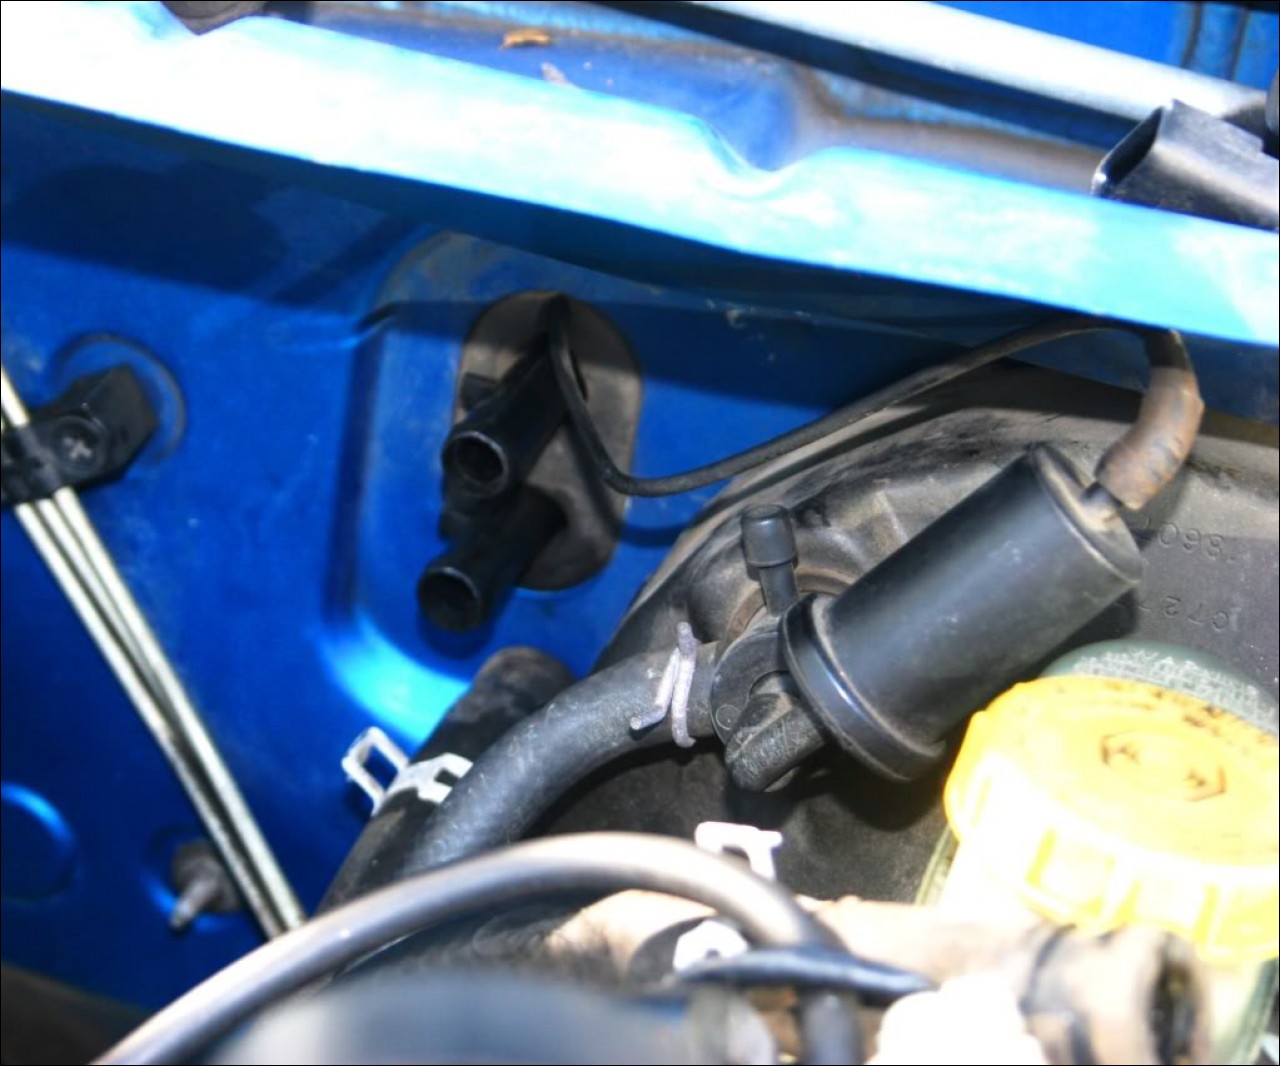 7. Remove the three nuts on the studs coming out of the firewall in the engine compartment. 8. Remove the nut and screw holding the HVAC box in on the inside. 9. At this point, the HVAC box is free, but will still be stuck in place. It helps here to have a friend or relative so that you can be pulling the box out on both ends. It’s awkward pulling the driver’s side end of the box because the dash is very much in your way. Cover your seats or take off your shoes, crawl in the car, reach over the dash, and without smashing your head into the rear view mirror, pull on the box. The foam on the top of the passenger’s-side-most vent may be melted to the foam above it. Use a knife to cut between the foam and remove the HVAC assembly.    Here you can see the stains from the heater core leaking. 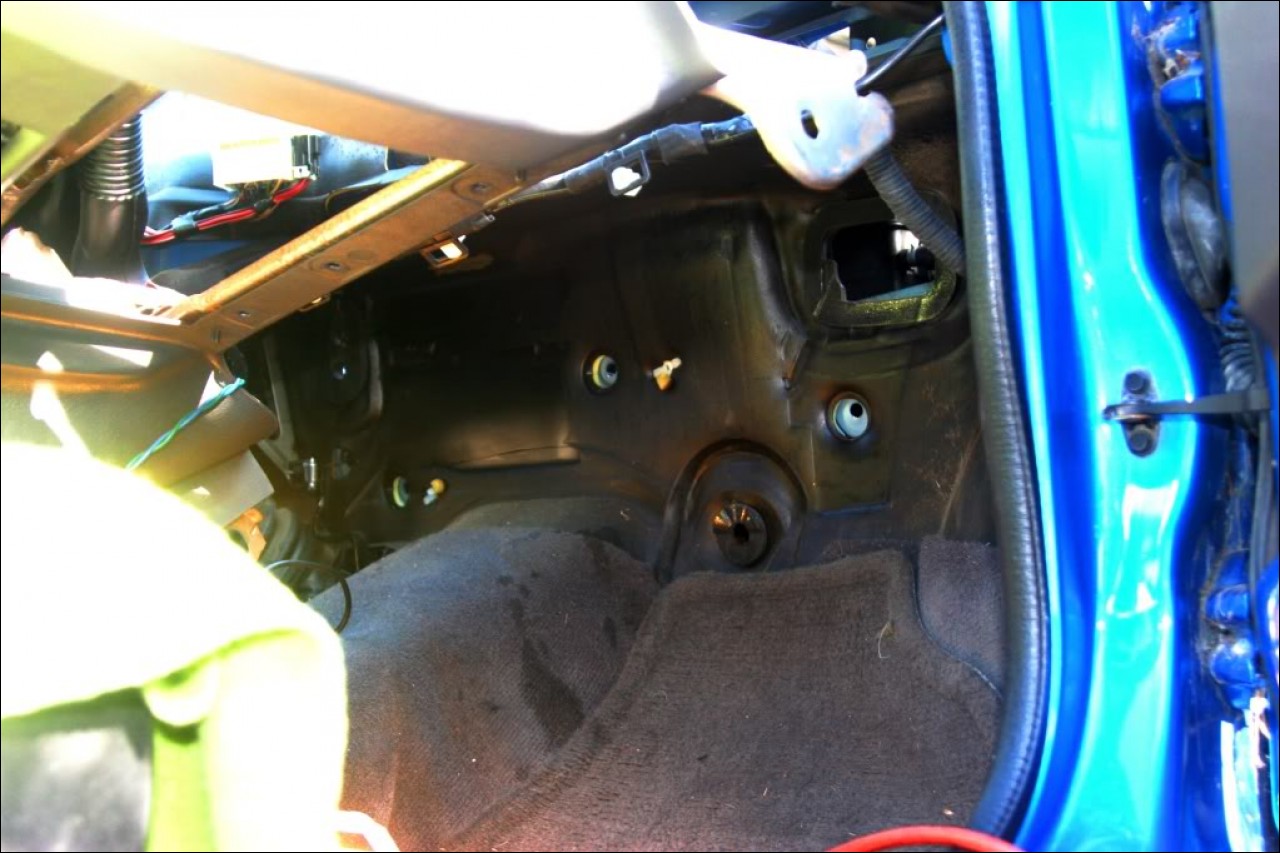 I) Remove heater core 1. Separate the two halves of the HVAC box held together by four 8mm screws (and don’t mind my bicycle helmet padding plus glue gun foam replacement job).  2. Separate the halves of the heater core box by removing the screws and retaining clips (careful, clips will fly 5 feet into the air [if their progress isn’t impeded by your eyeball] if not removed mindfully; and don’t forget about this sneaky one…)  3. Just one last step. (At this point, feel free to yell at your heater core, “We know you’re in there,” followed by a “You can run but you can’t hide.” You’ve earned it). If your foam is deteriorated just pull it off and replace it. If it’s still good, slit it along the seams and pull the box apart.  4. Remove the heater core and replace with your new one.  5. If you have AC and are uninstalling it, or have already removed all of the underhood AC components, replace the AC section with a non-AC section if you want to save about eight pounds. J) Reverse to install Submitted by xxx@******.com Revision 0 Article submitted on 1 Mar 2015 Viewed 7815 times |
|
|
||||