|
*** Disclaimer *** This is simply a guide showing how I removed the ABS from my car. I am not responsible for any damage or anything that may happen to you or anyone else in your car or any damage to your car itself if you choose to follow what I have written here. It goes without saying this is a project best done with the engine/tranny removed. You can do it with the motor in there, but you're going to make it a bigger pain than it already is to do. Be sure to have lots of blue paper towels or just plain work towels & a bucket to catch brake fluid before you get started. First things first, you will not need to touch any of the hardlines going to the rear of the car. They are the same on all 90-93 Celica models. Also, the hard line that goes to the driver's side fender/wheel well will stay & not be replaced. Here are all the lines physically in the car going along the firewall to the passenger side to the ABS unit which will be referred to as the brick from now on.  Let's start with removing the old ABS lines. You are going to want to get as much brake fluid out of your reservior as you can - I use a syringe to suck it out + it gets a lot of the dirty pieces that are most likely in there thanks to the previous owner of the car & their lack of maintenance. When you remove the lines there will be brake fluid still in there no matter how dry you think the system is. Brake fluid will eat paint if you let it sit on there so if you get any fluid on your paint wipe it up immediately! Remove all the lines going towards the passenger side that are coming off the proportioning valve or p-valve. The p-valve is here - circled in green. You can see all the lines coming off it. You will be removing the p-valve also. You will have to remove the clutch line that goes to the p-valve. You will also be removing the 2-way valve which is right on the brake booster - it's circled in yellow.  6 lines go to and from the ABS brick. 1 Line goes to the pass side wheel well from the brick & you will most likely have to remove your wheel to get it off. It goes to your soft (either rubber or SS) brake lines which go to the caliper. You may have to unbolt some power steering lines to get to the ABS lines to remove them. Same thing goes for PS fluid - clean it up immediately. The 5 other lines snake around & go to the ABS brick. There is an additional P-Valve that is on the back side of the ABS brick.. you have to take off the 6 lines that go to the P-Valve and the brick itself.  1 other line comes directly off the master cylinder & goes to the 2-way -- this will also be replaced. Again, leave the line going to the driver's side. Now that all the lines are out you have the ABS brick left. In order to remove this heavy chunk of metal you are going to have to have your pass side wheel off, take off the plastic fender liner part way, get under the car & remove the windshield washer reservoir. There are several bolts holding it in underneath & its a pain to remove. The ABS brick won't come loose without taking out the windshield washer reservoir though so you have to do it. Make sure this is empty too otherwise you will get a shower when you unhook the line going to the sprayers. Once you get all the bolts holding in the ABS brick removed, you will have some left over bits coming from the harness that went to the ABS and the lines that were for testing and for the ABS relay that was mounted to the Radiator. You can either cut them off & nicely tape the wires back to the harness or tuck them away somewhere - your choice. You'll also have to figure out a new way to mount your small fuse box there if you still have it. Also, there is a small bracket that holds down the hard power steering lines... you can cut that off of the ABS Brick bracket, and use that by itself to keep the PS lines secure. The Non-ABS lines you will need are shown in this drawing below. The lines circled in red are discontinued & can no longer be ordered brand new from Toyota. They are also in red font below. You are basically going to need to get 4 lines, a P-Valve & 3-way valve.  Lines No longer available from Toyota: 47314-20360 Line passenger to P-valve 47313-20480 Line P-valve to 3-way 47311-20710 Line P-valve to master cylinder 47315-20490 Line driver to 3-way (same on both ABS & w/o ABS, no need to remove or replace) Still available from Toyota, low stock: 47312-20190 Line master cyl to 3-way 47150-20140 AWD Non-ABS Proportioning valve 90413-10182 3-way These brake lines can be sourced from any 90-93 ST, GT or GT-S model which did not have ABS. ST's are the most common to find & most didn't have ABS so they are your best bet in a junkyard. When removing the lines be careful not to mess up the ends where you remove the nuts otherwise you will have leaking problems down the road. Of course, you can make the lines yourself if you know how to flare lines. Regarding the P-valve: You will notice when you removed your ABS brick there is a P-valve on it. It appears to be the same P-Valve as the Non ABS AWD P-valve. Use that P-valve at your own risk as it is as old as your car. Some people use P-valves from Non ABS ST's and are just fine with it. I believe that it will change your brake bias more towards the front since ST's typically have drums in the rear. The P-valve found in Non-ABS Camry Alltrac's are the same part number as the Non ABS Alltrac P-valve. A brand new Non ABS AWD P-valve does run ~$158 USD so if you are on a budget & just grab a P-valve from the FWD Celica you stripped just be aware you may notice a difference in brake bias if you are that in tune with your car. 3-way valves can be had off junkyard Celica's or can be bought brand new, again your choice depending on budget & your own personal safety concerns. When you replace the lines you will find the clips are different. You will only have 1 line going to the passenger side so you will need to make sure you get the clips in the junkyard along with the lines so it will look like your car was never equipped with ABS. Start by putting in your new P-valve & attach all the non ABS lines to it, re-attach your clutch line & install your 3-way & arrange the lines to it as well. Install the line that goes from the 3-way to the master cylinder also. With the correct brackets, you should have something looking like this:  Put your windshield washer reservoir back in, button everything back up & fill with brake fluid. Check your connections for any leaks & tighten if necessary. Bleed the system. When you start the car you'll notice the ABS light on in the dash. This is the ABS ECU flipping out b/c it can't locate any of the ABS stuff you just removed. There are 2 ways to take care of the ABS idiot light. 1 way is you can simply remove the light bulb behind the cluster. The other way is removing the ABS ECU. It's located on the passenger side in the backseat area. You will have to remove the backseat bottom & top in order to remove the plastic trim where the speaker is located. Once you get that trim removed, you'll see the speaker itself & a big plastic box. Remove the speaker + box. Now, you'll see some wire loom & 3 nuts. The 3 nuts are where the ABS ECU is located. You can see in the pics below where it is looking up into the rear quarter area. Disconnect the plugs, remove the ECU & voila! no more ABS idiot light. 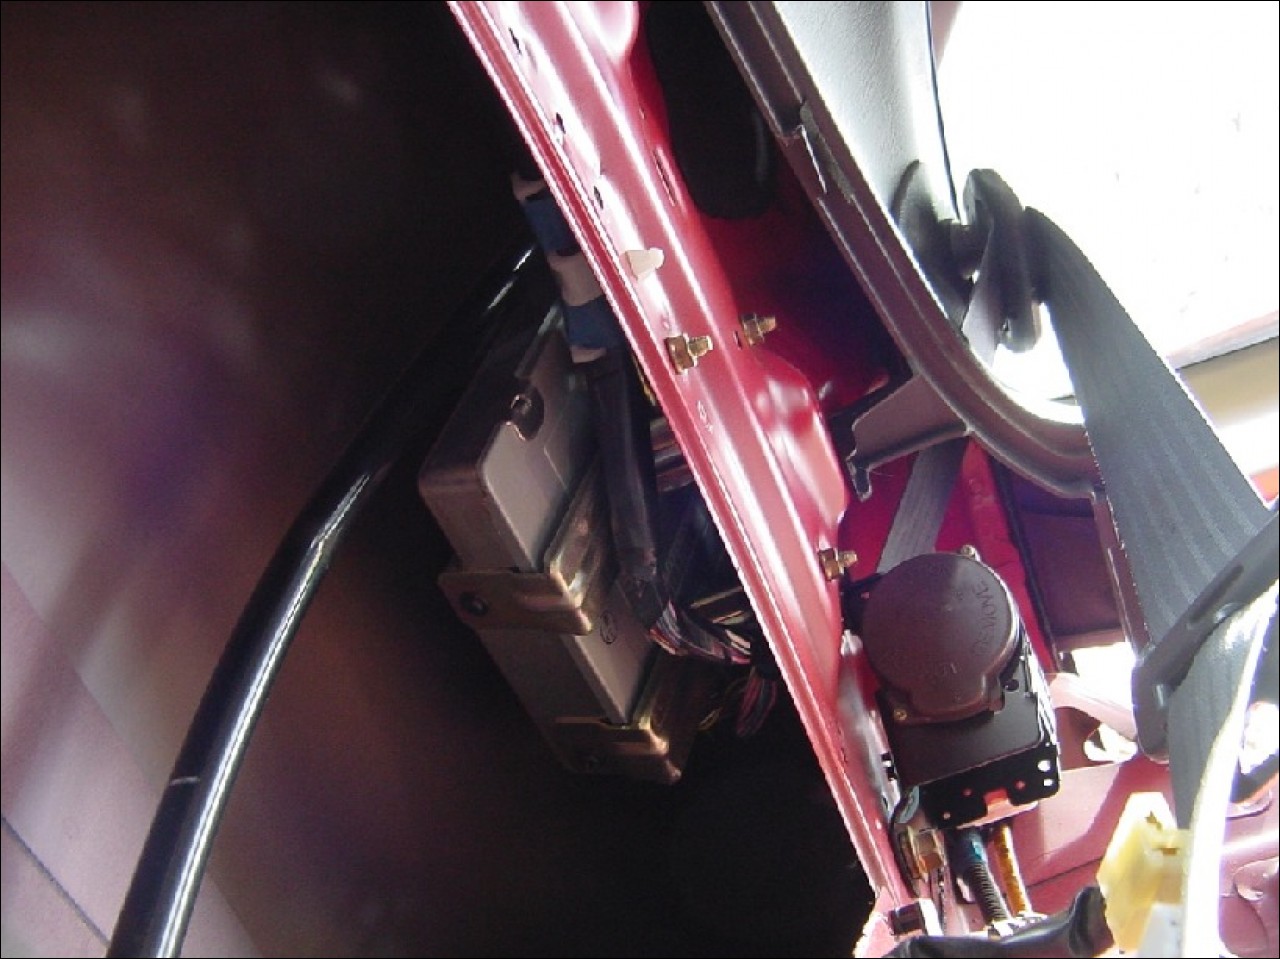 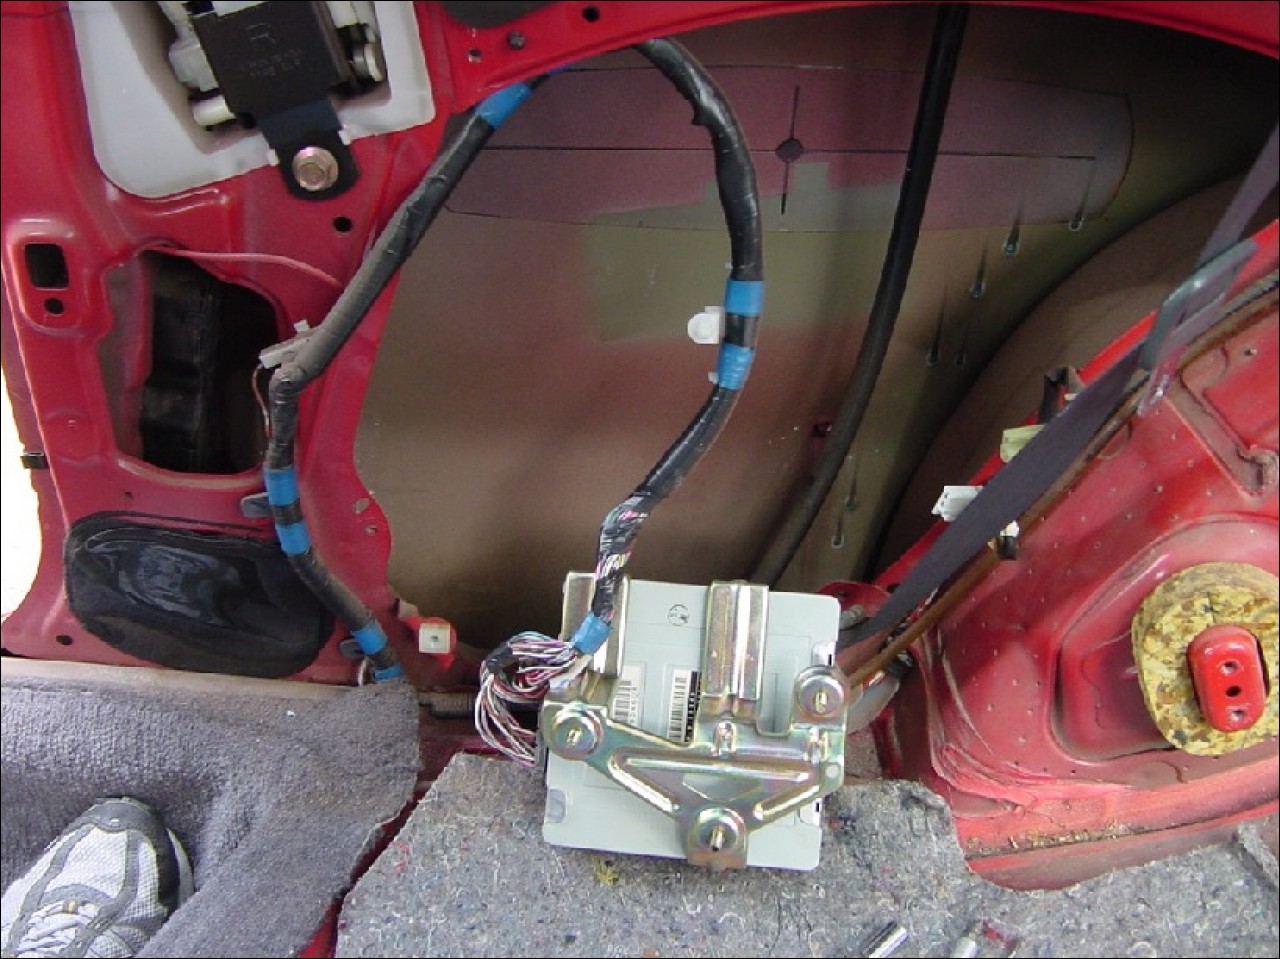 When you're done, your engine bay should look like this - less cluttered & look like the factory option was never there on your car.  If you get all your parts from a junkyard this is a very inexpensive project which will clean up your engine bay, drop a few pounds off the front & allow you better control over braking in certain weather situations namely snow/ice. Submitted by xxx@******.com Revision 0 Article submitted on 18 Oct 2010 Viewed 10686 times |
|
|
||||