|
How-To install new prothane Lower Control Arm Bushings (& Endlinks, Swaybar bushings, Ball joints) 1. Removing Lower Control Arm 1 - Soak the Vertical and Horizontal bolts that pass through the bushings, along with the endlink bolts at least overnight. Preferrable to repeat 3-4 times. 2 - Raise vehicle securely on jack stands and remove wheels. 3 - Remove clevice bolt that passes through ball joint. (15mm bolt / 18mm nut) 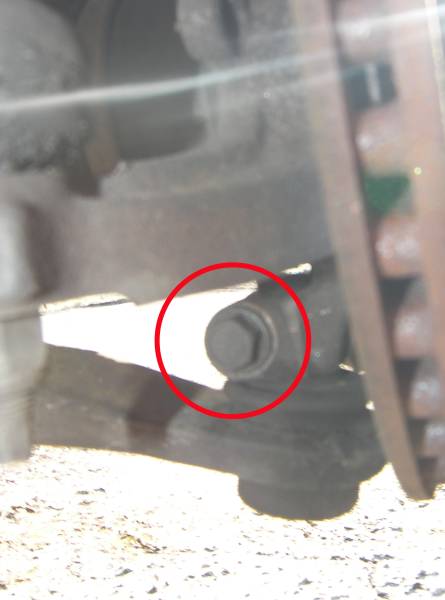 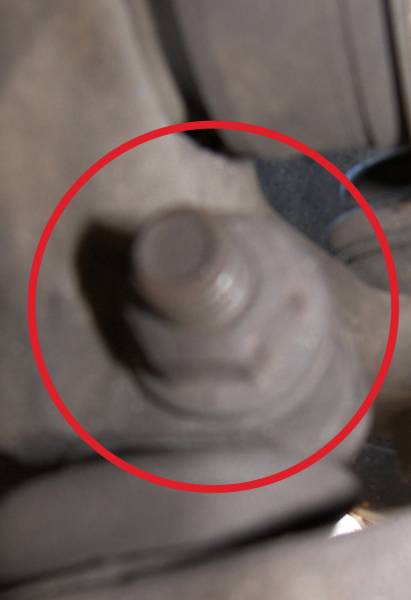 4 - Use a long pry bar (18-24"+) into the hole in the K-member to lever down the control arm enough to pop the ball joint from the steering knuckle.  5 - Remove the swaybar end link (13mm nut / 15mm bolt) NOTE: The rubber surrounding the bolt at the bottom of the end links can get in the way of keeping a wrench on there. Cut away any excess rubber that is in the way to make it easier for yourself.  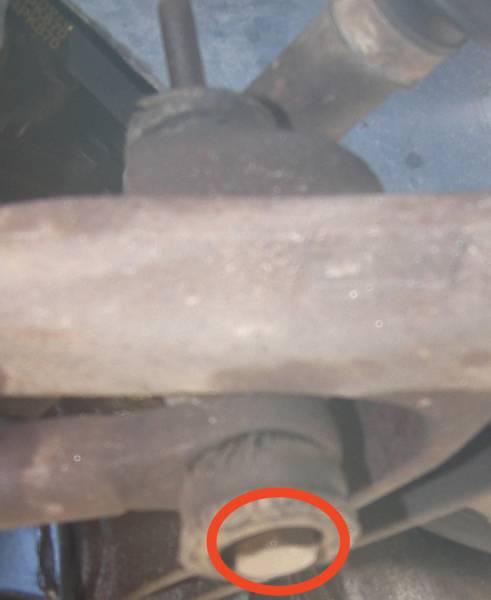 6 - Remove the vertical bolt (21mm). NOTE: If the bolt shows signs of rust you may need to use an impact wrench, heat on the bolt or other methods to get these to shift. They are no longer a dealer item so Be Careful! 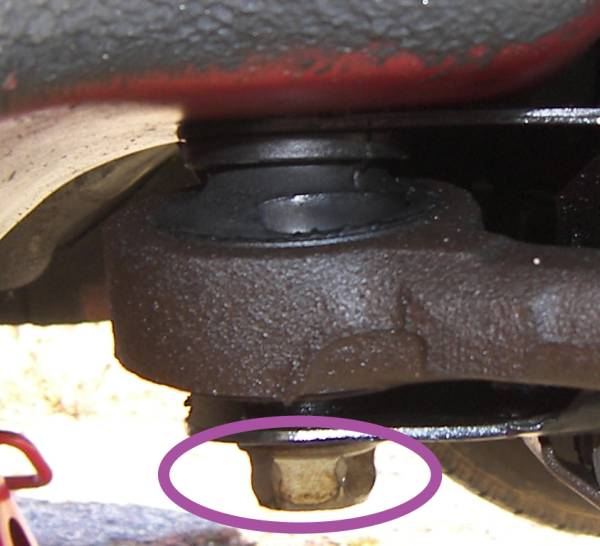 7 - Remove the horizontal nut and bolt. (21mm nut, Rounded 18mm bolt attached to a metal tab). This was torqued on good, use an impact wrench if you have one available. You can also fit a deep socket (6-point only) inside the K-member to assist in holding the bolt still so that the tab doesn't take all of the strain. Replacement nuts & bolt are available through the dealer. About $28 for both pairs of nuts & bolts. 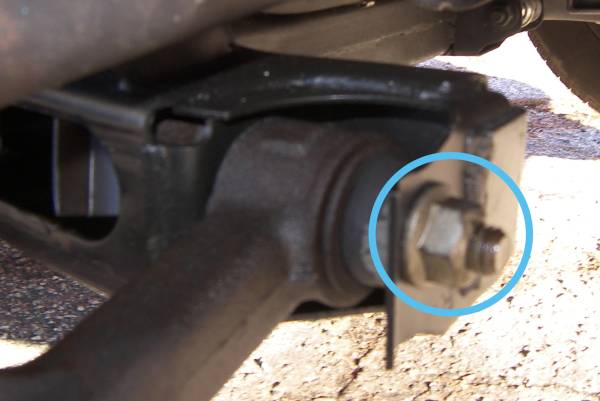 8 - Remove control arm from the car. 9 - Repeat with the other side. 10 - Don't start celebrating yet. You're not even half way done. Put the beer back in the fridge. 2. Pressing & Hacking & Burning There are several ways to go about getting the bushings and ball joint out of the arms and back in again. No matter how you choose to do them, make sure to: Remove all rubber debris from inside the horizontal sleeve but leave the sleeve present and remove the sleeve for the vertical bushing (making sure to smooth out any scoring of the control arm). 1 - Pry the boot of the ball joint with a small screwdriver or pry tool. Use a rag to clean off excess grease so not to get it on what tool you are using to press it out. 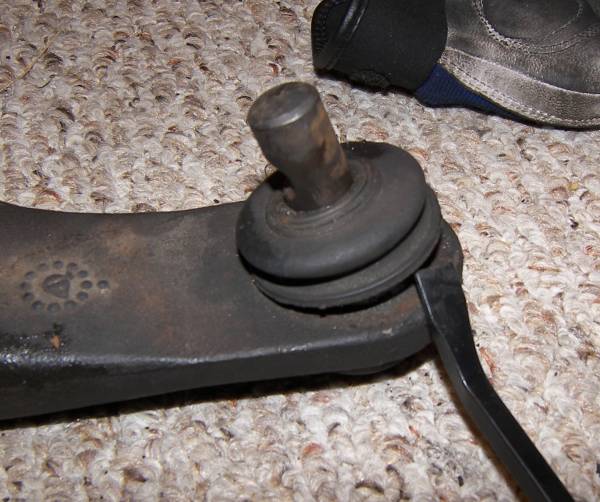 2 - Press out the ball joint. 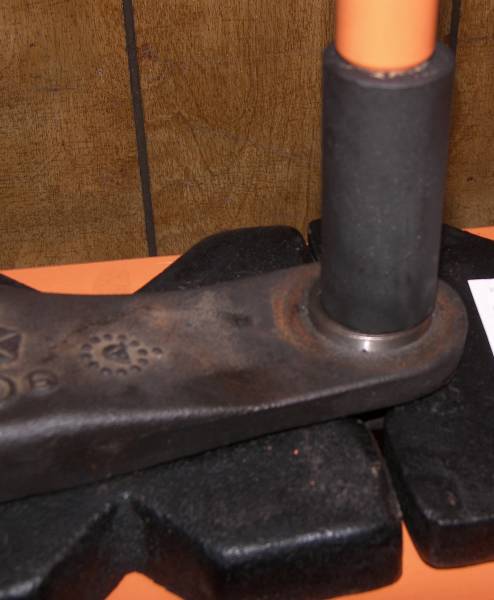 3 - Press (or burn or cut) out the rubber from the sleeves of the bushings. [this may take a while] 4 - Use a hacksaw to create a weak channel in the vertical bushing sleeve (NOT the horizontal - the prothane kit needs that sleeve intact) and use a hammer & chisel/screwdriver to force the sleeve to fold in on itself. Some PB around this sleeve can help the process, also. Sand down any scarring you created. 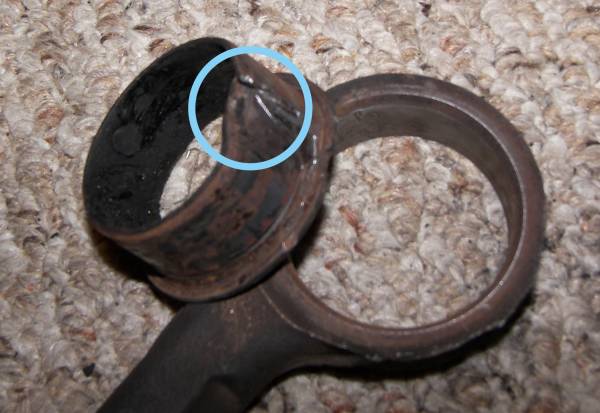 5 - Repeat for the other control arm. You should now have a pair that look like this: 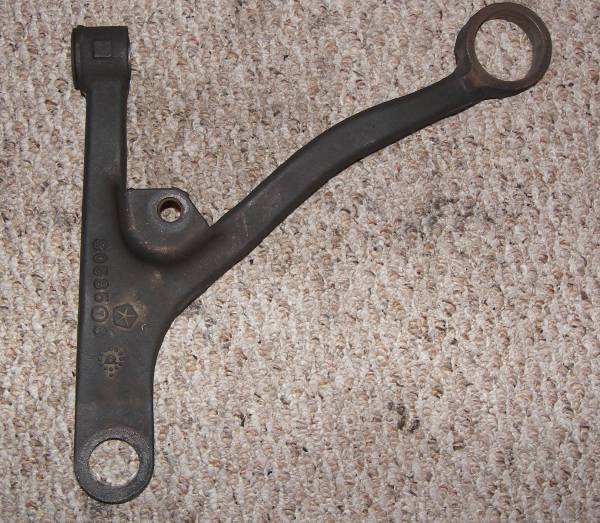 3. Some more pressing and a little lube 1 - Press in new ball joint ensuring the notch for the clevice bolt faces towards the vertical bushing, push on the boot. 2 - RTFM! Control arm bushings come with their own instructions that are clear to follow. The bushings are not an extreme tight fit and you can probably push them in by hand. 3 - You should now have some complete control arms:  4. Sway bar bushings The prothane kit comes with both 20mm and 22mm bushings. Make sure you use the correct ones. 1 - Do these one side at a time. Remove the 13mm bolt and let the bracket swing down. 2 - Remove stock bushing. 3 - Sand down any rust that developed on the bar inside the old bushing. 4 - Lube up the inside of the bushing or the bar itself where the bushing sits. 5 - Install the bushing on the bar with the split facing forwards away from bolt. I used a little lube on the outside also. 6 - Attach the bracket and insert the bolt. Leave the bolt about 3/4" out so that you have enough play to easily install the other side. 7 - Repeat with other side then tighten both bolts. Pictures can be seen below with the control arms installed. 5. Re-installing Control Arms 1. The vertical side is the easiest to get in. Wiggle that side in first and push the bolt through to hold it in place. Put the nut on the end so that the bolt doesn't get pushed back in. 2. The horizontal side is more difficult because it is just as large as the gap it goes in. Lube the top and bottom, use whatever means of force (BFH) you have to get that side in position. Thread the vertical bolt up, leaving it 1/2" loose. 3. Use the pry bar again to set the ball joint into the steering knuckle. Leaving the gap on the vertical bushing bolt makes this much easier. 4. Install clevice bolt, tighten the vertical bushing bolt and the horizontal nut all the way. 5. Repeat 1-4 for the other side. 6. Start eyeing the fridge... you're almost there. 7. Install the new end links on one side, but just thread the nut a couple of threads to hold it in place. You will see that the new end links are much shorter than the OEM. Leaving play on one side will let you install the other. These nuts & bolts are both 14mm. A 9/16" in unison with a 14mm will work just fine if you only have one of each. 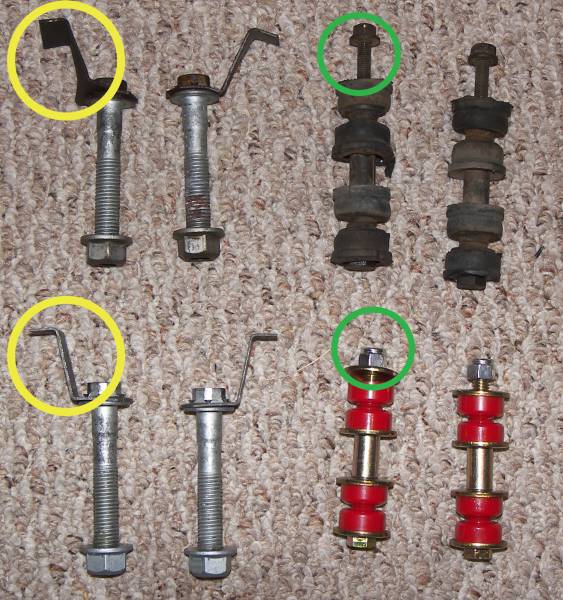 8. Install the other side of end links and then tighten both sides up snug. 9. Check all of the bolts / nuts you removed are tightened all the way. You should now have something like this: 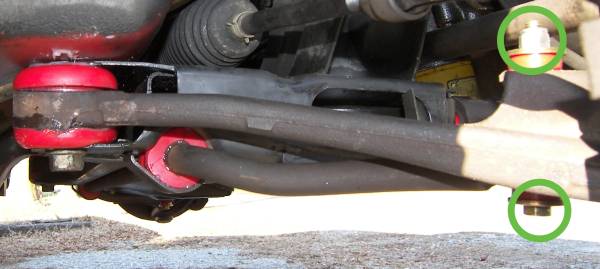 and 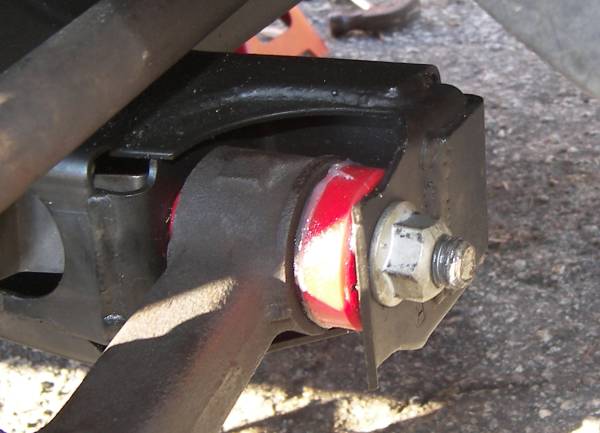 10. You're done. Put the wheels back on, lower the car, torque the lug nuts, drink beer.
Things to watch out for:
Vertical bolt. There is a captive nut in the frame of the car that you can't see. If the bolt is rusted into the nut, it'll break it free from the car and it'll just spin. You'll then have to cut a hole in the floorboard and get creative with a torch and some vice grips. Horizontal bolt. There is a steel sleeve inside the bushing that likes to seize onto the bolt. 2 problems develop. 1st, there's almost no room to swing a hammer at it, especially with an engine in the car. If you have a 2.4 with the stratus oil pump, the damn arm is in the way. The engine needs to be lifted up a few inches to get to that side. 2nd, DON'T just pound it out. If you do, you risk having the bushing sleeve push through the bolt hole in the crossmember, enlarging and deforming it. Not easy to fix this. I had to weld a washer into the hole on mine to fix this issue. Best bet, if the sleeve is stuck, burn the bushing out and heat the hell out of the sleeve and it'll come right out. Takes about 10 minutes with a MAPP gas torch. Be careful, the bushing will pop hot molten rubber out as it's burning and that crap hurts like hell when it sticks to your skin. You can see the messed up hole in the 2nd and 3rd pic. 1st pic is normal. Courtesy of REKIII's project log. 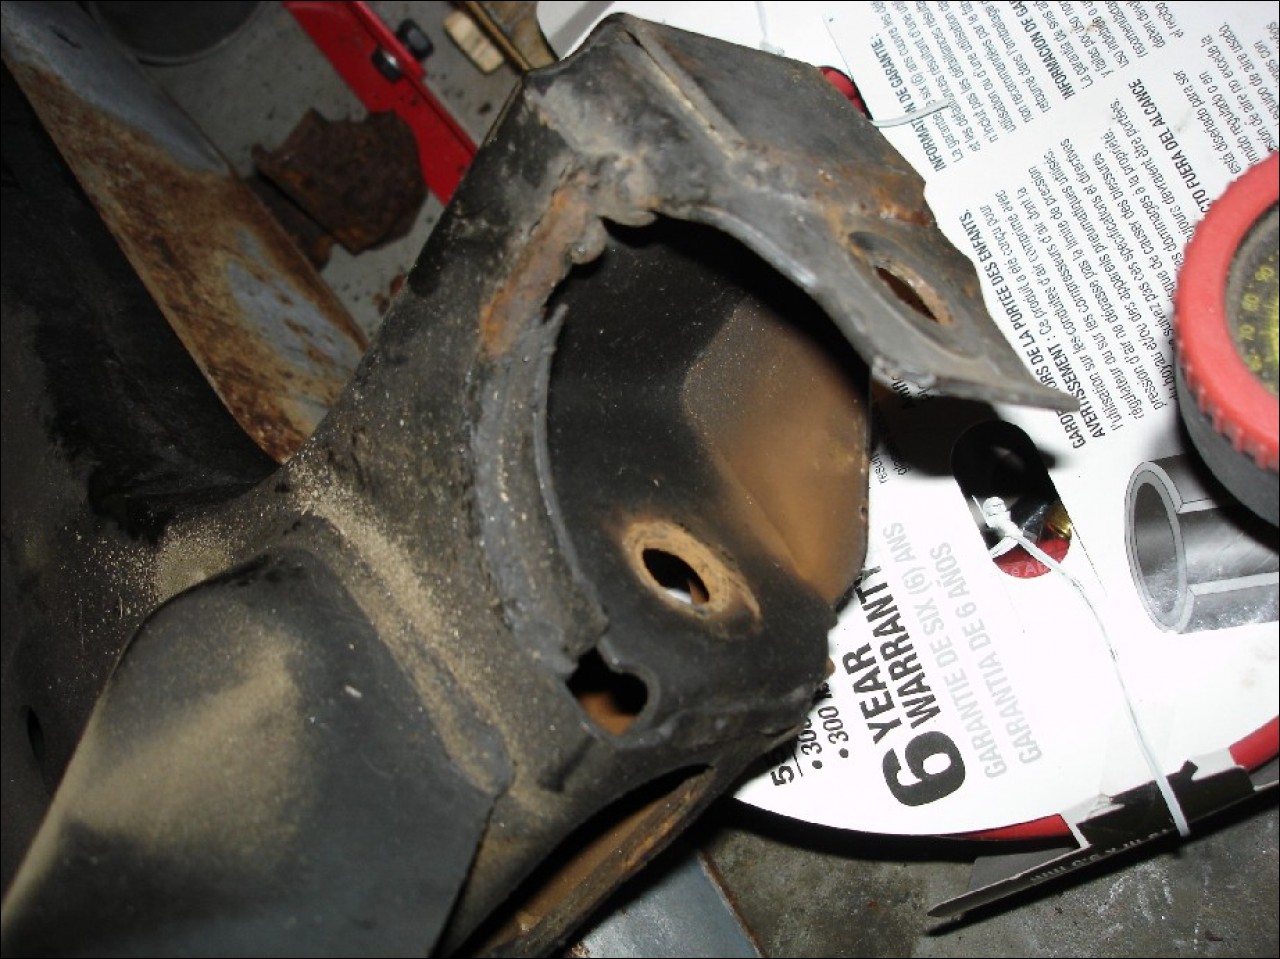 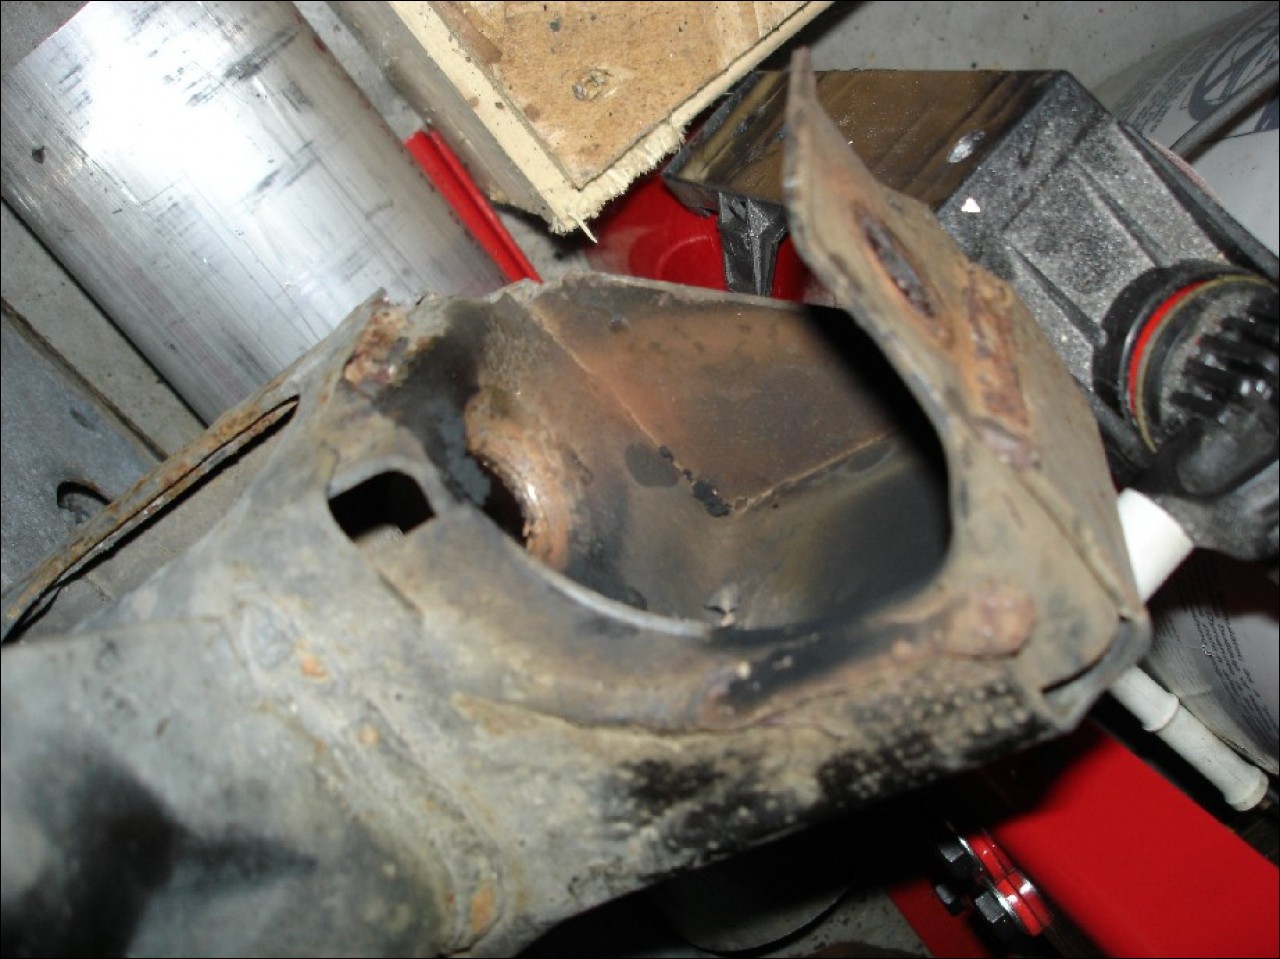 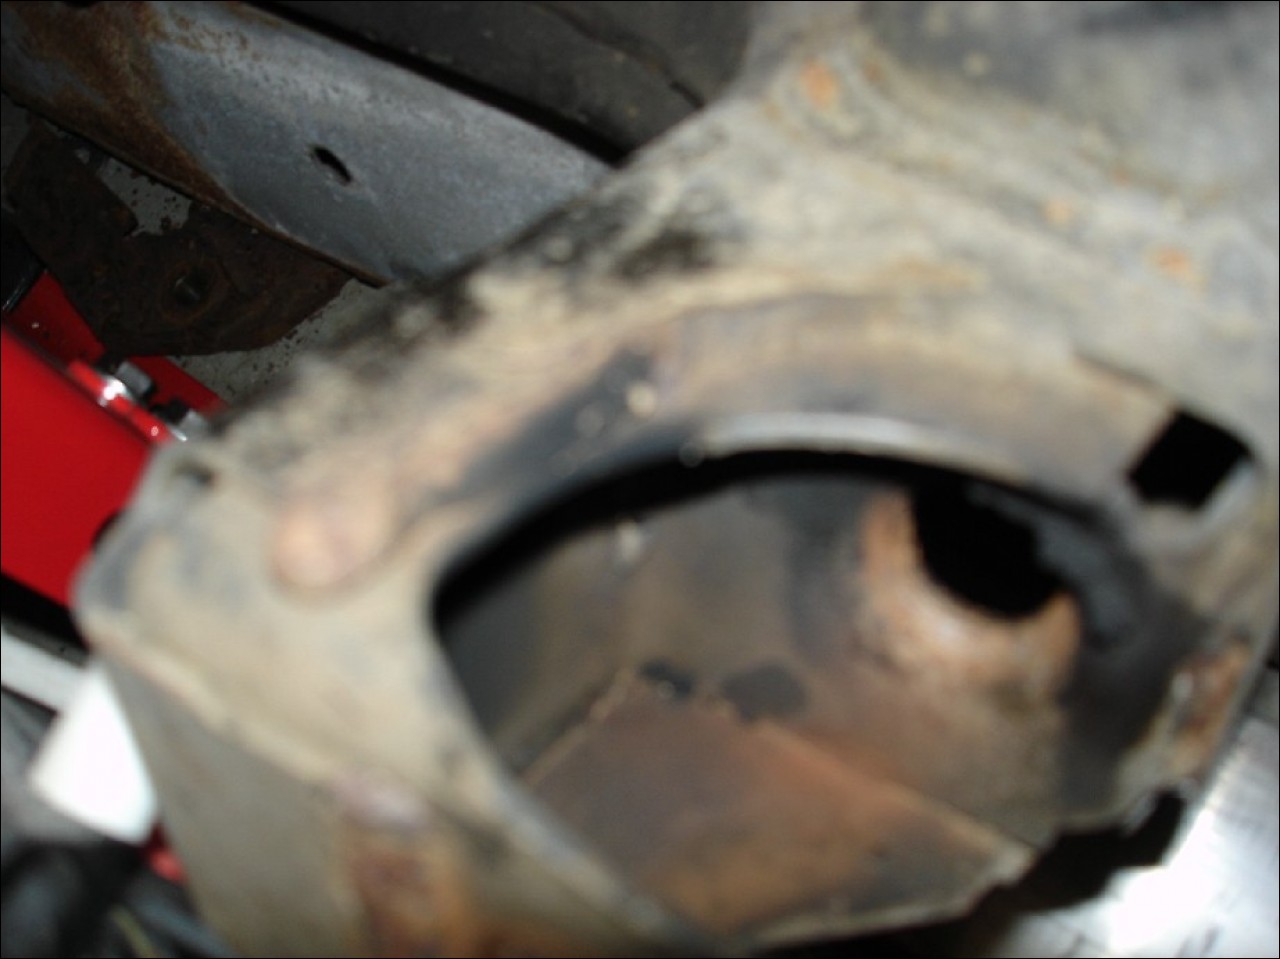 Submitted by xxx@******.com Revision 0 Article submitted on 2 Mar 2015 Viewed 9114 times |
|
|
||||