|
Mod: JIC Suspension (SA-1) Install (Pt 1 of 5) Modification Type: Performance Difficulty of Install/Modification: Moderate Preparation And Install Time: 5 hrs It can be a useful read for those who are unfamiliar with suspension systems and may need some sort of idea of the kind of work that needs to be done to get themselves up and running on their celica (or their car of choice). But for now, I will be concentrating on the JIC SA-1s. If you have a different suspension coilover type besides JIC, sure enough this article will help you in the removal of the stock suspension and assist in your installation. Anyway, I'll stop wasting time on introductions and start on what you will need. If you are truly a rookie or novice on suspension, I highly recommend that you have a partner help you. Preferrably one with experience in doing this mod. It will truly help you on some of the stock suspension removal process. I'd like to personally thank Dom Bacani for his great insight in his knowledge in suspension and all his help in making this car modification not only possible...but fun as well. Stuff you'll need:
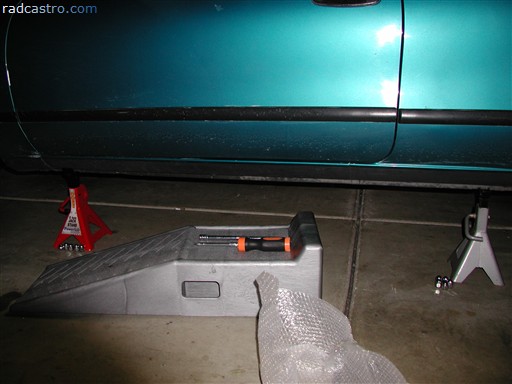
With all of that out of the way, we'll begin by jacking the car from the front. Add the two jack stands for the front of the car...then begin jacking the car from the back and add the other two. Don't know how? Click here. When you're done jacking the car up, both sides of the car should look like figure 1a. Of course, don't forget to slightly loosen the wheel bolts before completely lifting the car off the ground. It'll be too hard and too dangerous trying to remove the wheel when they're floating on 4 jacks. Figure 1a
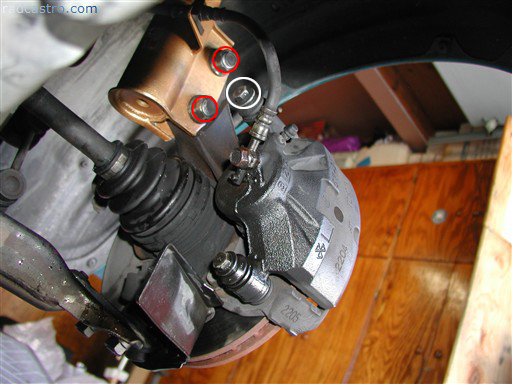
Now that we have the car on all fours, we can start working on the front suspension. Remove the wheel from the front and look behind the caliper. You should see a bolt that looks like the one below (Figure 2) Figure 2
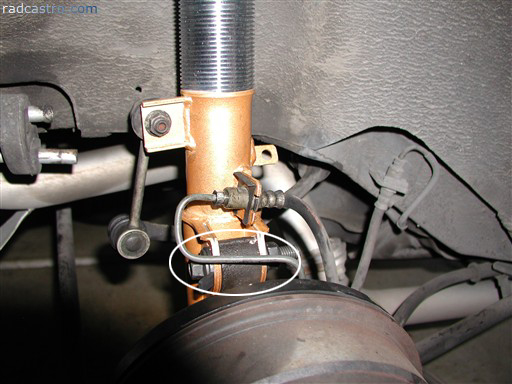
Note that the JICs are installed here but I am using this picture for reference in proper suspension removal. In Figure 2 remove the bolt circled above in white. Begin to spray the bolts designated in red circles to begin loosening up the bolts. This will get your caliper to look like this (Figure 3) Figure 3
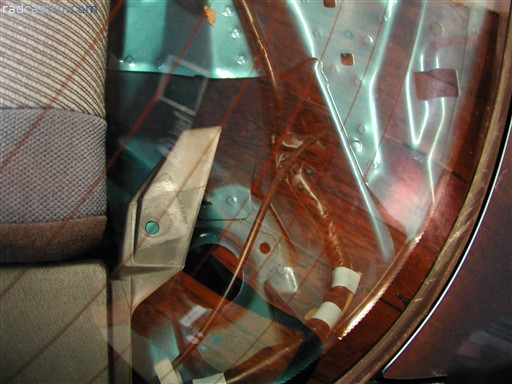
As you can see the brake line comes off of the JIC...but on a stock strut (Figure 4), the brake line will have to be taken out of the caliper and snake through the whole of the stock strut. I don't recommend cutting through the strut with a dremel kit or cutting machine since we might risk damaging the brake line. This is a close up of the stock strut and the little hole where the brake line will have to snake through. Figure 4
The location of the bolt that separates the brake line is illustrated in Figure 5. Figure 5
Remember to get you bucket ready for the oozing of the brake fluid when you unbolt the thing. When you snake the brake line out of the stock strut the next thing you need to do is remove the two big bolts on the bottom of the strut itself as illustrated in red circles under Figure 2. This is where the breaker bar comes into play and the super huge socket (19mm or 17mm) that should fit that bolt. When the two bolts finally come out, start unbolting the stock struts three bolts from above (Figure 6) and carefully remove and push the strut down. You may need to spray more liquid wrench to just get the stock strut out from the wheels hub assembly. Figure 6
When you're done you should have the stock strut by your side in all its naked glory (Figure 7) Figure 7
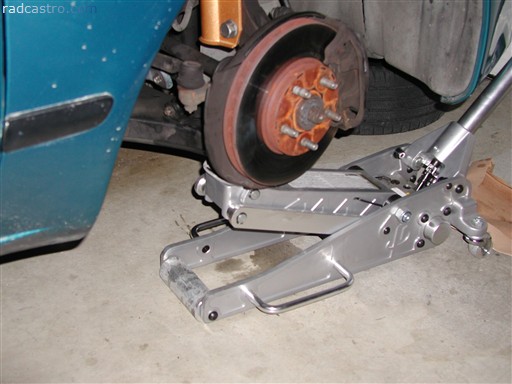
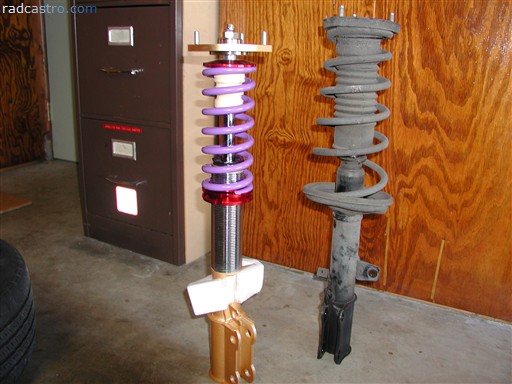
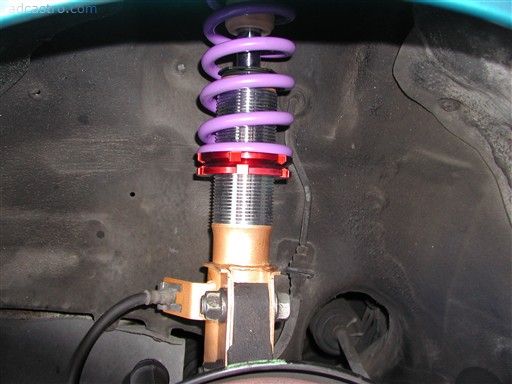
If you are at this part of the article, you just had a taste of removing one of the stock struts. Congrats. But we're not even out of the woods yet. Installing the JIC coilover will be a breeze if you have an extra hydrolic jack. You'll see why. Figure 8 (drivers side)
Figure 9 (passengers side)
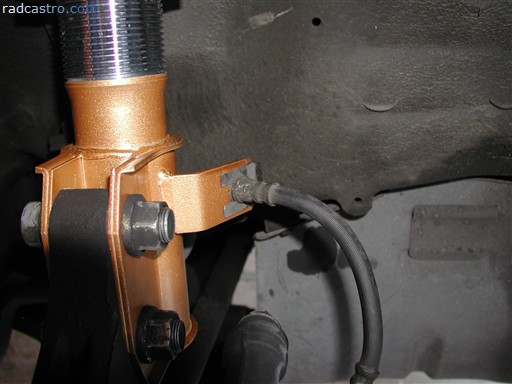
Make sure that the four hex bolts on top of the JIC are tight on the camber/caster settings and that the tick marks are set at zero! Use the allen wrench to tighten. But don't tighten too hard. Look closely at the previous pictures, they should give you a good idea at how to position the JIC coilovers. The Eibach Alignment Kit will not be needed for the front coilovers.
When you get the 1st bolt into the lower strut of the JIC, everything else is pretty much cake walk. You can then proceed to rebolt the brake line and clip the brake line to the JICs brake line holder as designated in Figure 11.
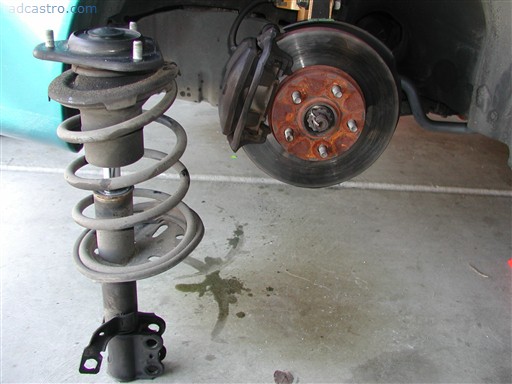
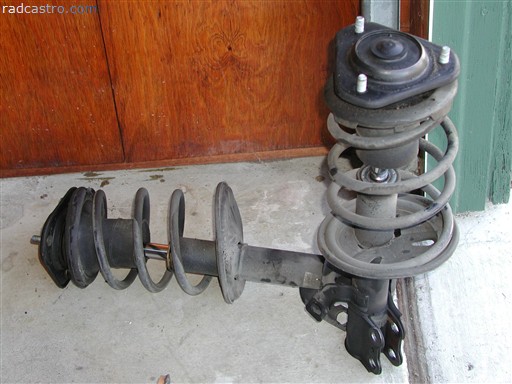
You should then repeat the other side so that you can complete the front part of your cars suspension. Below is the removed stock struts (Figure 12). Figure 12
You can consider this part of the install 35% complete. Now that the front suspension is completed we can take a breather and begin contemplating on how we're planning to do the rear suspension. Figure 14
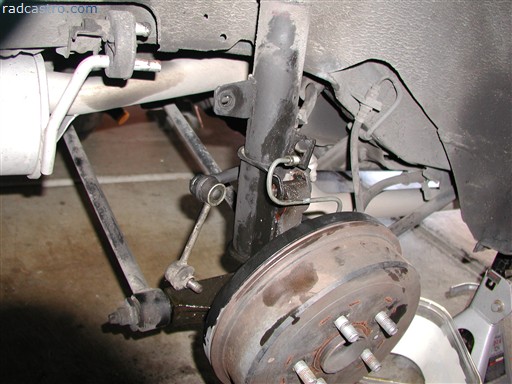
start to detach the rear sway bar from the end links as shown in Figure 15 Figure 15
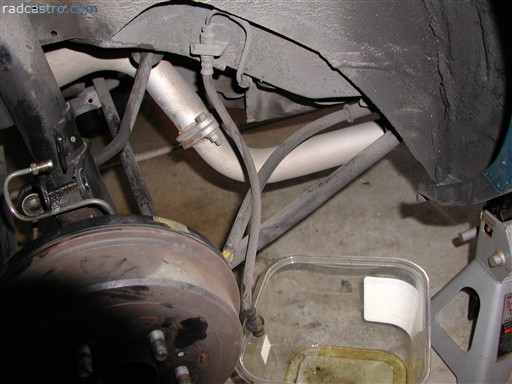
Once you remove the rear sway bar from the end links, bring in the brake fluid bucket and start unbolting the brake line from the drums as illustrated in Figure 16. Figure 16
The next thing we need to do now is access the three bolts that hold onto the stock strut. Since we're working on the rear you will need to pry open the back panels to get to this area. Figure 17
The back panels that cover the stock struts bolts may be a bit hard to get out since we have a brake light in the way. Just unharness the rear window brake light from the panel...and the rest of the panel should come off alot easier. Figure 18
When you finally get the old stuff off, you can get a chance to compare. So here they are side by side
Looking at the top of the rear JICs, you'll notice that there is nothing to adjust except the dampener knob. No need to worry about the setting or how it will be installed in the rear. Figure 20
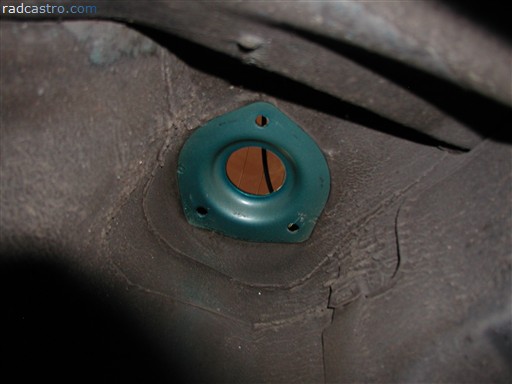
The next thing we need to do is grab a light and shine it up the area in which the coilover will be installed. Figure 21
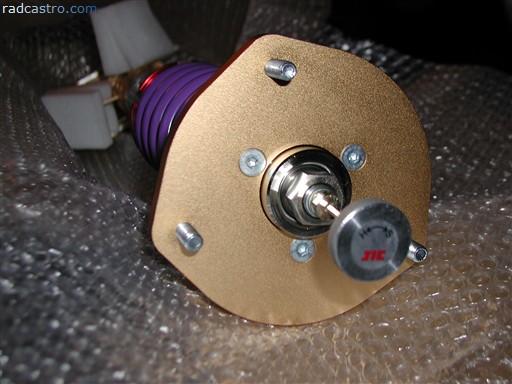
Look at the shape in figure 21 carefully. This is exacly how the coilovers should fit. Look at Figure 20 as a reference. Once you do get the top bolted in, get the eibach alignment kit ready (Figure 22). Figure 22
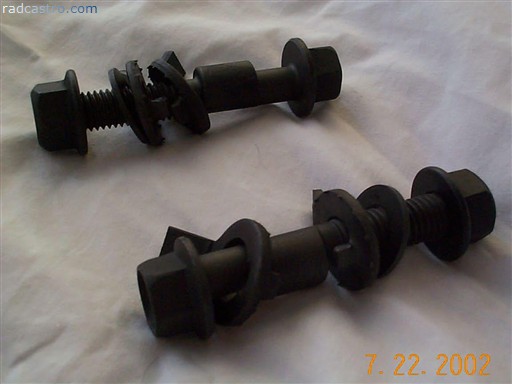
Once the alignment kit is out, get one of the bolts and line it up on the upper hole of the strut. The upper hole of the JIC strut should have the eibach alignment bolt as shown below and the lowest hole should have the regular bolt. Figure 23
If you notice in Figure 22, the bolt has a weird shape on its thread. Sort of like an oval. What you need to do is make sure that the protruding part of the oval is facing upward. Basically, when you are installing the bolt, make sure the number is facing right side up and level with the ground, much like the illustration below. The proper direction of the bolt is also displayed. Figure 24
Continue to do perform the same procedures for the rear on the other side of the car. When you finally get all the old struts out, take a bow and dance around your struts. I did. Figure 25
Welcome to the final part of this modification article. I consider this part the most fun since everything here goes downhill (easy) from here. I'm now assuming that you have all the JIC coilovers in place on all four corners of the car. Figure 26 (location of bleed screw)
Figure 27
Be careful not to give any gaps between the springs and upper part of the strut. Basically we shouldn't see too much movement from the springs. This is where we have to bust out with mr. caliper. Using the caliper, make a guestimate on your ride height. Make sure you only use two sets of settings. One for the front set of coilovers and one for the back. Figure 28
Once you have the settings, place the wheels back but do not torque the bolts on the wheel so that you can continue adjusting the ride height. Just tighten it enough so that the wheels don't fall off when you drop the car. When the car is down, you will need to use the camber measurement tool. The tool usually looks like this: Figure 29
Assuming that you're still in your garage or somewhere that has completely flat ground, you then place the camber measurement tool on the brake rotor/brake drum and hope that the camber tool will register at "0". Figure 30
On the JICs default settings coupled with the Eibach alignment kit (bolts), I was able to register "0" on all corners of the suspension. Why is this important? Because we want FULL contact patch of our entire tire. This also guarantees even tire wear. If you don't register a "0"...well...you can try adjusting the suspension's camber settings via top mount or readjust the camber bolt installed in the rear until you get a "0" on the measurements. Unless you're taking your car to the track, I don't recommend having a camber setting of anything other than "0". Figure 31
That's it! Give yourself a pat on the back and ride into the sunset! Submitted by xxx@******.com Revision 0 Article submitted on 30 Mar 2010 Viewed 4890 times |
|
|
||||