    This is a step by step procedure in installing the Lambo hinges for your 7th Generation Celica. You need the right tools to do the right job and a friend to help you out during the install. Patience is a must and take your time making the install perfect and successful, there is no way you can do this install in 30 mins. The required tools you need: Ratchet Size 10, 12, 13 sockets Socket extention Size 14 open end wrench Grinder with a blade disc to cut Hammer Long Nose Pliers Flat Screw Driver Phillips Screw Driver Allen Wrenchs Electrical Tape Blade or a Cutter AntiRust Spray Paint Masking Tape Grease Gun 1st Step: Remove front bumper, fenders and side skirt(No need to take out the whole skirt if you are still using the stock one, just need the front part lowered a little to have access on the fenders bolt). Use the size 10 socket to remove the bolts on top of the bumper and underneath (if you are still using stock front end). Next remove headlights and remove fenders. All using size 10 sockets. If im not mistaken, there are 9 bolts and 2 nuts holding the fender. Look at the picture below.  and car should look like this...  2nd Step: Get your grinder and cut/shave the bracket that holds the part of the fender. And spray it with your antirust paint. Look at the picture below.    3rd Step: Remove door catch. I put the bolt back in there so you wont leave a hole visible. Look at the picture below.  4rth Step: Tape the door using the masking tape starting from half level of the door all the way to the roof. Make sure you tape it good so it will stay in place. I forgot to take pictures but it is similar to this, this is not enough tape though coz the door is very heavy so add more lines to it. Look at picture below. (Picture provided by Satoshi)   and it should look like this... 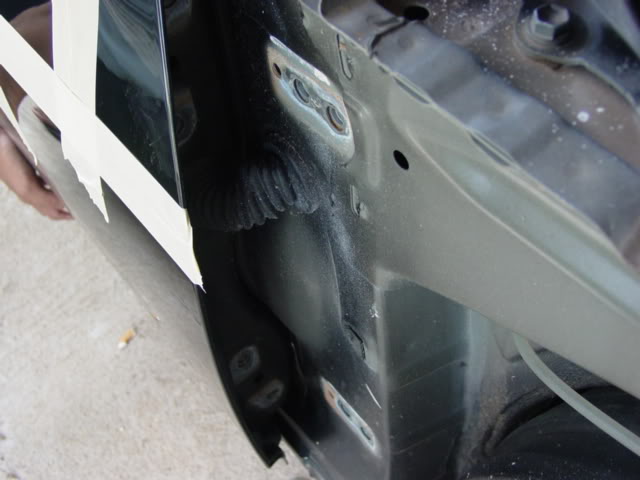 6th Step: Install the hinges. Make sure each bolt has a washer with it, 8 bolts with 8 washers. Now you will have to use the size 13 socket for this. DO NOT TIGHTEN EVERYTHING UNTIL ALL THE BOLTS ARE IN PLACE. IF everything is good then tighten the door area first then the frame area next. Look at the picture below.   7th Step: After that take all masking tape out of the door and have your friend open it up, the door is very heavy so make sure he can lift the door up. It is required since you have to put the shocks in place. Use your allen wrench to screw the bolt in on the top part of the shock. Make sure you grease the bolt first. Look at picture below.    8th Step: Use the long nose pliers to hold the lock pin in place and knock it in gently until it goes in. Look at the picture below.   9th Step: You need a grease gun to grease the hinges, this is required to keep the hindge from squeeling and last longer. Look at the picture below.   10th step: You may need to adjust the height of the door in order to close properly so you will have to adjust this nut. Screw it forward, the hindge will adjust the door high, Backward, the height will be low. You need a size 14 socket and an allen wrench for this. Look at the picture below.   11th Step: Now when you open the door up, the grommet for the wires will stretch out, you dont have to extend these wires since the are long already, the kit comes with wires and connectors to extend the wires. Looking at the picture below, i didnt cut the grommet out, only part of it. Use your cutter or blade for this process and make sure be safe. Tape all the wires up nice and neat.    Success...  12th Step: Grab your fender and you will need the grinder again to cut this, if you dont feel like cutting it then you can just fold it like what Satoshi did. We decided to cut it to make it a cleaner look Make sure you put a cloth or a towel so you wont scratch the fender. Make sure you use a mechanics goggle and be very careful in grinding. Look at the picture below. Satoshis fender roll. [image]http://plaza.umin.ac.jp/~satoshi/pic2161.jpg">       13th Step: Spray your fender with antirust paint on the inside where its been cut. Look at the picture below.    14th Step: Install the fender and this is how it should look. Look at the picture below.  15th Step: When all the hinges are installed, you can install the front bumper, side skirts and headlight back on and youre good to go!   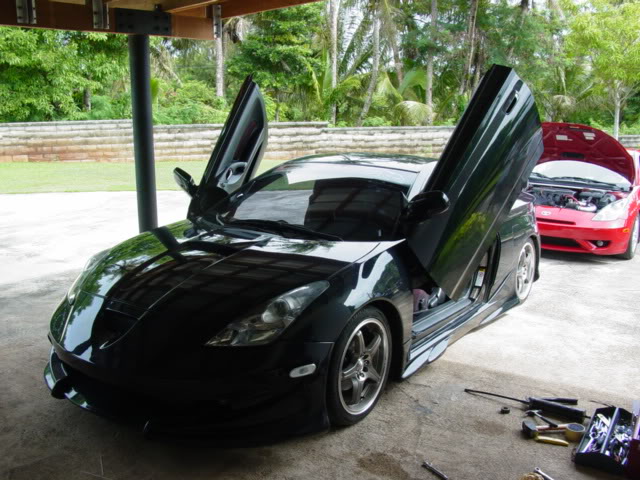 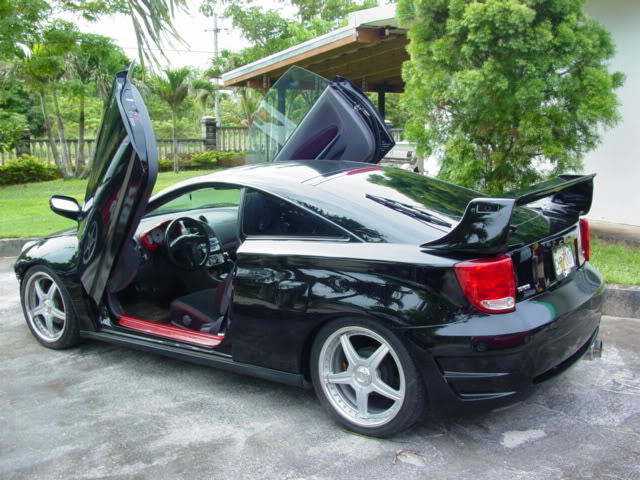 The whole process applies on the other side. Enjoy! Brought to you by: -Celica Garage Works of the Celica Development Club- Submitted by xxx@******.com Revision 0 Article submitted on 30 Mar 2010 Last modified on 30 Mar 2010 Viewed 7767 times |
|
|
||||